Service Virtualization

Service Virtualization is a powerful back-end application simulator that removes dependencies on backend applications and third-party systems to enable faster quality & performance testing and accelerated time-to-market. It enables them to stay focused on the system under test, reduce the overall cost of ownership for application testing, and reduce time-to-market their software applications.

How Service Virtualization Works

Figure 1 represents a typical setup where system under test communicates with back-end system.

Figure 1: Setup Without Service Virtualization

Figure 2  represents setup where back-end systems is replaced by service virtualization which will simulates the behavior and performance characteristics of back-end systems.

Figure 2: Set Up With Service Virtualization

Key Features

  • Highly stable and battle-proven product
  • A single appliance is capable of handling a load, 100-1000x more than other legacy solutions available.
  • The deployment of service is a fast single-step process.
  • designed as an appliance/VM to minimize deployment complexities, no upgrades, maintenance, sandboxing, or conflicting software version concerns.
  • Strong protocol support
    • Simulating http/https based services – SOAP, XML, HTML, AJAX/JSON.
    • Supporting WebSockets, Sockets (TCP, UDP), FTP, SMTP, IMAP, POP3, DNS, java, EJB, JMS, JDBC, CICS, MF, MQ, Hessian, etc.
    • Built-in support for application services: Chase Payment processing Gateway, VISA issuers/merchant, Blackhawk Network Gift card processing, Responsys Email, Cheetah Mail, ReD (Retail Decisions).
  • Version Controlling of Service Definition
  • In built version control system enables to keep and manage version control for services created
  • Seamless integration with version control system like Git, bitbucket, etc.
  • Statistical Distribution of Services Time
  • Enables to mimic a response time served from a real endpoint server.
  • Customization of Simulated Services
  • Offers rich parametrization styles to help create appropriate data to be served by simulated services.
  • Built-in network virtualization
  • Allows to simulate remote geo-location or bandwidth-constrained service.
  • Simulate network faults (connection failures).
  • Customization of Simulated Services
  • Offers rich parametrization styles to help create appropriate data to be served by simulated services.

Components of Service Virtualization

Services

Service is a collection of requests and responses. Each service has a unique name and is associated with a unique URL. Service comprises of Templates, Parameters, and Service Settings. They are added either by recording services or manually using Add Service feature.

Sample Request

Sample Response

Service comprises:

  • Templates
  • Parameters
  • Service Settings

Services are added by either recording or manually using Add Service feature.

Templates

User can use templates to define the response of a service. Templates use various parameters to send the appropriate response based on the request data. One service can have one or more templates. In case of multiple templates, conditions are used to select the template for the matching response.

Parameters

User can define various parameters associated with a Service. Parameters are variables whose values could be set based on the incoming request, or user defined to be picked from a Dataset or different inbuilt functions. Parameters are used for parameterization of the response templates, in defining conditions for selection of the template and as index for Indexed Datasets. Service Virtualization supports several types of parameters to hold the values for composing service responses, template selection, and data selection. For more details refer to Parameter Settings.

Service Settings

Service settings are used to configure the following settings:      

  • HTTP Headers
  • HTTP settings
  • Trace level
  • Service Time Delay
  • Comments
  • Callback Methods
  • Forward Settings

Accessing Service Virtualization Server

User needs to follow the below-mentioned steps to login to Service Virtualization:

  1. Open web browser and provide the product URL. The Cavisson login window is displayed.
Figure 3: Login Page

2. Enter the user name and password and click the Login This displays the Product UI page as shown in figure below. Select Service Virtualization option from the top panel.

Figure 4: Service Virtualization Selection

Service Virtualization Home page consists of a left panel consisting of multiple options related to adding, recording services along with service virtualization settings. In case of user have added services beforehand, they will be able to view the added services in the Service table where they can get the option to perform important operations on these services, explained later in this manual.

Service Virtualization consists of following sections:

  • Top Panel
  • Left Panel
  • Right Panel

Top Panel

Top Right panel consists of the sections as per the figure below:

Figure 5: Top Panel Icon

Icon

Description

Click this icon to show or hide columns

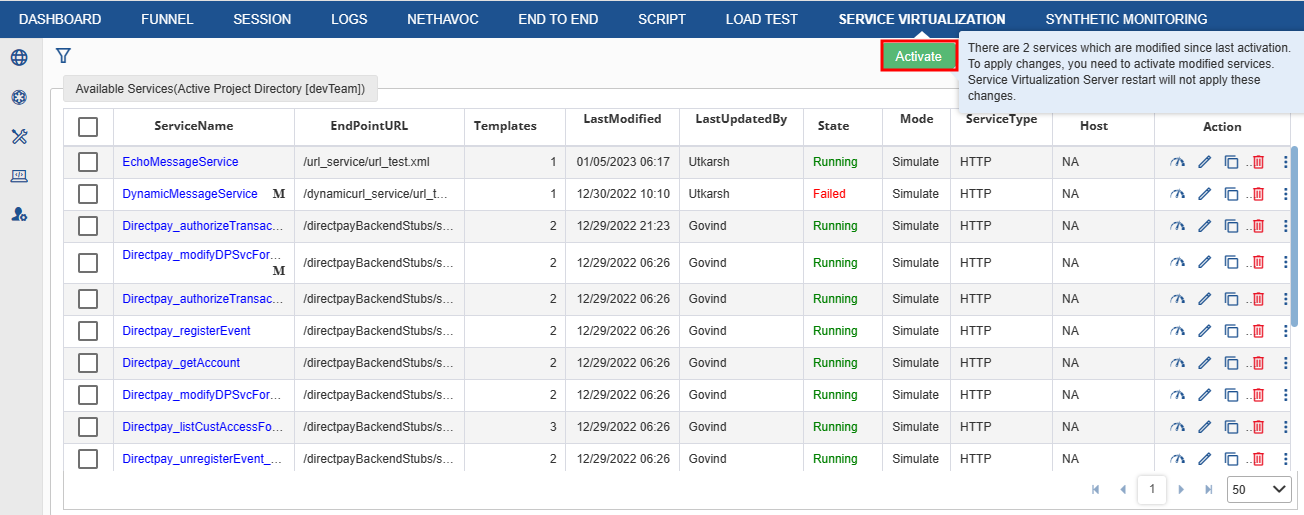
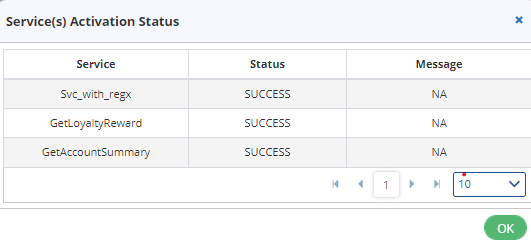
Activate: This button is used to activate a service. (available only if service is in the modified stage.)

To Change Forward Mode and Activate: It is used to forward a request to some other server.

Monitor:  A critical component of Cavisson’s product suite, Monitors are responsible for fetching data from all the supported technologies with the added functionality of creating customized monitors to retrieve data from logs, databases, processes, methods, etc.

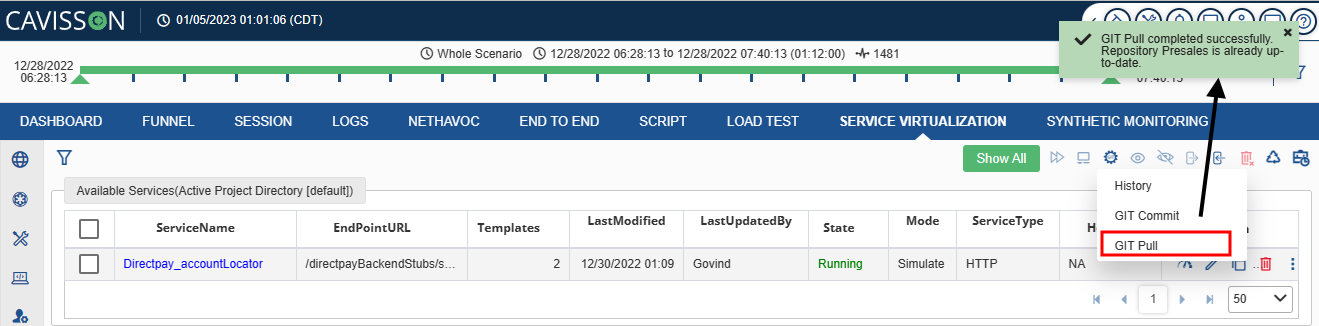
GIT: It is used to manage a project or a set of files as they change over time. It is of three types: History, GIT Commit, and GIT Pull.

To Start Service(s) and Activate: It is used to start and activate service.

To Stop Service(s) and Activate: It is used to stop and activate service.

To Export Service(s): It is used to export a service.

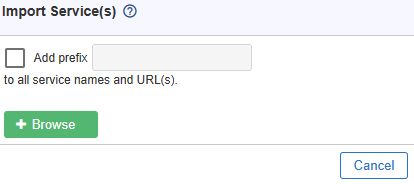
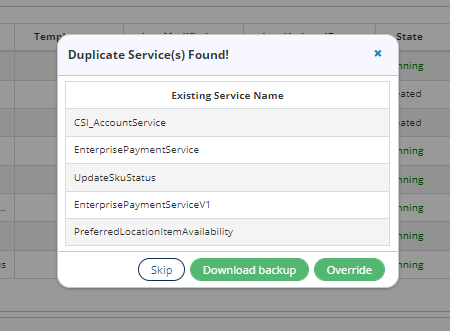
To Import Service(s): It is used to import a service.

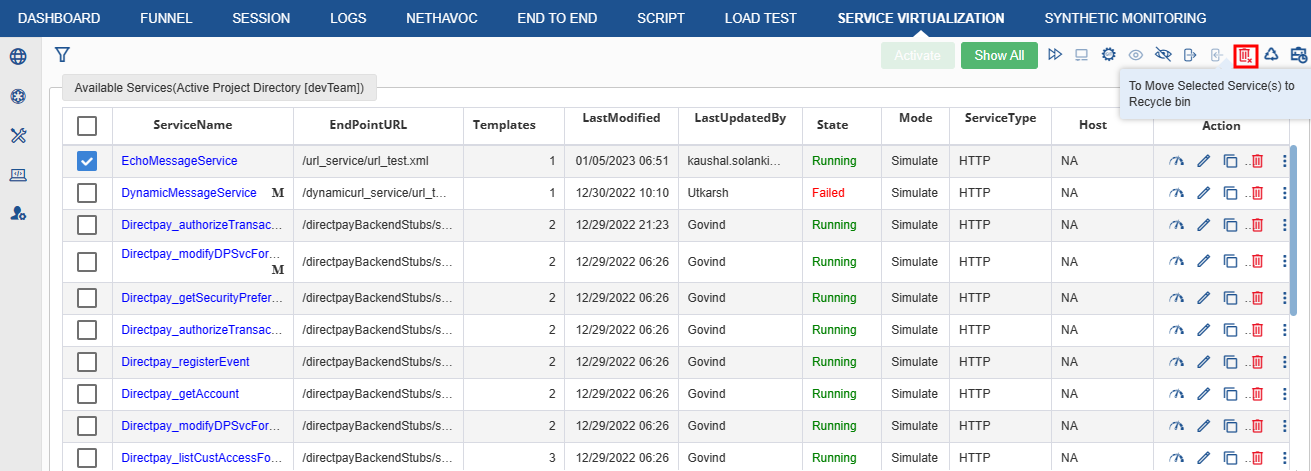
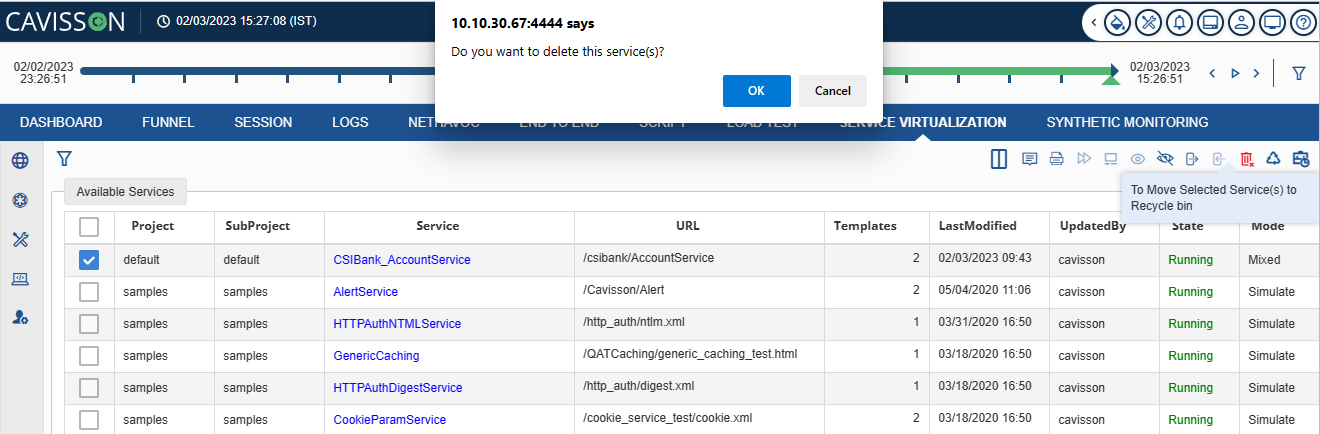
To Move Selected Service(s) to Recycle Bin: It is used to move a selected service to the recycle bin.

Recycle Bin: It is used to show how many services are present in the recycle bin.

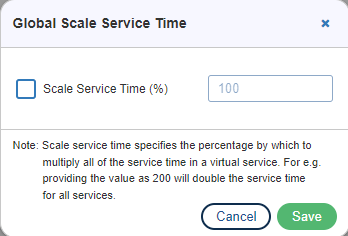
Global Scale Service Time: It allows you to scale your service time by a specified multiplication factor.

Let us understand these icons in detail.

Activate Services

This feature is to activate all changes done in services and other settings. Once the services are activated, they are available on the corresponding Service Virtualization controller as simulated services ready for testing the application. The Services is available on the IP address of user’s controller and the HTTP port specified in user’s Configuration HTTP settings.

Figure 6: Activate Service

We can activate the service individually by clicking kebab and activate service option will pop up. The activate button keep on fluctuating until all the service are not activated state. We can click that to activate multiple service at same time. Once all the services are activated, the activate button will disappear. Once user click the Activate button, following fields appears:

Figure 7: Service Activation Status
  1. Service: It is the name given to the service.
  2. Status: It shows the current status of the service such as: Failed, Success, Stopped, and Running.
  3. Message: It shows the reason for the status of a service.

Note: The message will only be displayed when the service gets failed.column.

To Change Forward Mode and Activate

Forward mode is to forward request to some other server. This option will change the template settings to forward mode and activate. To access this click on the  icon as shown in below figure.

Figure 8: To change Forward mode 

GIT

In GIT, we have the following options as shown in the figure below:

  • History
  • GIT Commit
  • GIT Pull

To access GIT, click on the icon as shown in below figure.

Figure 9: GIT
  1. History: On clicking this option, user can see the history of commits. There are following options:
Figure: 10 History
  • Git Options: There are two options in GIT:
    • Show Logs: It shows the service logs.
    • Show Modified Files: It shows the committed files which have been modified.

  • File: It shows the file name along with its path.
  • Status: It shows the status of the current file.
  • Diff: It shows the difference between the files committed and reverted.
  • Revert: It is used for reverting a file.


2. GIT Commit: On clicking this option, user commits their changes to the repository along with the option to add comments against a particular commit.

Figure 12: GIT Commit

3. GIT Pull: On clicking this option, user can fetch the latest commits from the repository.

Figure 12: GIT Pull

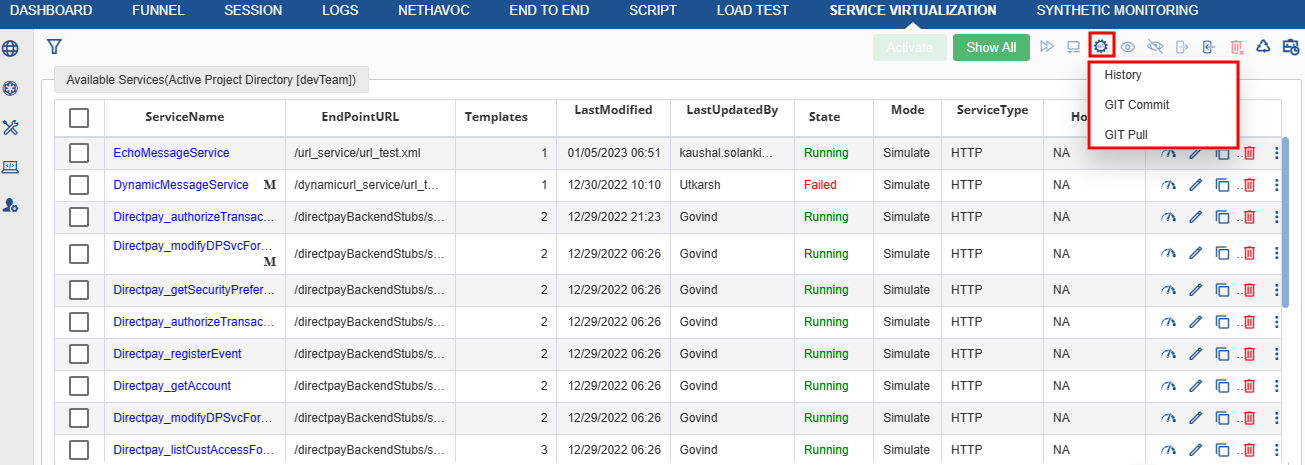
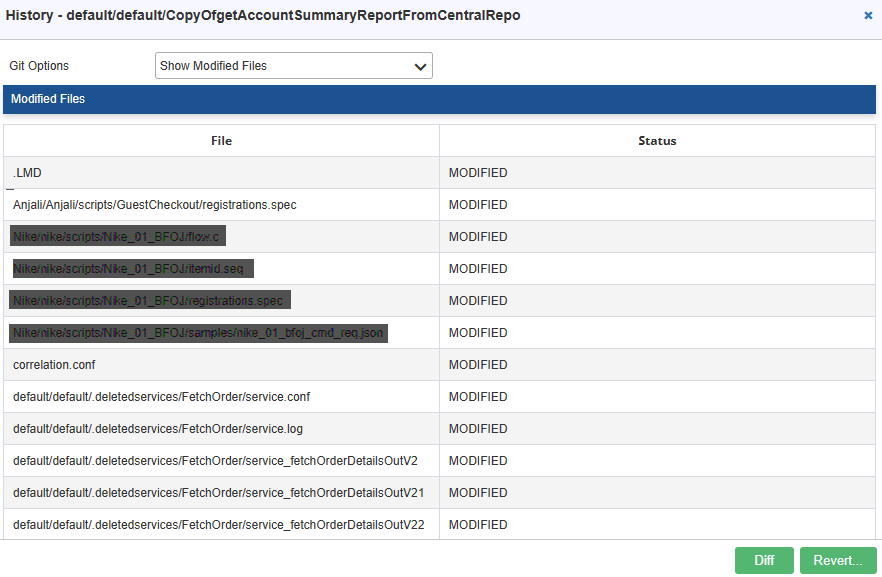
Note: If GIT is not configured from Configuration> GIT Configuration then CVS version commit and log will be displayed.
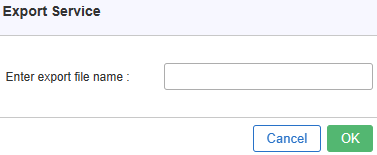
Export Services

This feature of Service Virtualization provides the facility to export any service to desktop in compressed format.  

  1. Select any service to export and click on Export Service button as shown in figure below.
Figure 13: Export service Icon

2. Provide the export file name in the window that is displayed.

Figure 14: Export Service

3. Click OK, the file is exported to the default download directory with the provided name.

Import Services

Service Virtualization allows to import services if user have services in a compressed form in their system created by export service.

  1. Click Import Service(s) button on the Service Virtualization screen as shown in below figure.
Figure 15: Import Service Icon

Once user click the icon, following window appears.

Figure 16: Import Service

2. If user wants to add Prefix in Import Service, then he can enable the check box. For details of Prefix, refer to the Notes

3. Click the Browse button to choose the file from the local machine.

4. User can optionally add prefix in case he/she wants to create services with different end point. This gets added in the service name(s) and Url(s) as mentioned below.

Note:

  • Maximum allowed Prefix Length is 128
  • Following characters are allowed:
    • Alpha & Numeric Characters
    • Special Characters: /, -, _
  • First character must always be ‘/’ whereas the last character should never be ‘/’
  • Prefix will be added before the URL.
  • In case of service name, the special characters in prefix will be replaced by “_” and the first character of prefix (/) will be ignored. For example:
    • URL is /cavisson/services/create.json
    • Service Name is createService
    • Prefix is /sanbox/QA
    • New URL and Service will be as follows:
      • URL – /sandbox/QA/cavisson/services/create.json
      • Service Name – sandbox_QAcreateService
  1. Click upload to import the services. When imported, system checks whether any service exists with the same name or not.

Note:

  • If system encounter any duplicate service display the options to override, take backup of existing service, or skip duplicates.
  • After importing the service, it will be marked as a NEW service and the status of the service will show as IMPORTED. In order to use the service, we need to activate the imported service.
Figure 17: Duplicate Service Found Message

Start/Stop a Service

This feature is to enable or disable any service. Service Virtualization simulates only enabled services.

Figure 18: Start/Stop Service
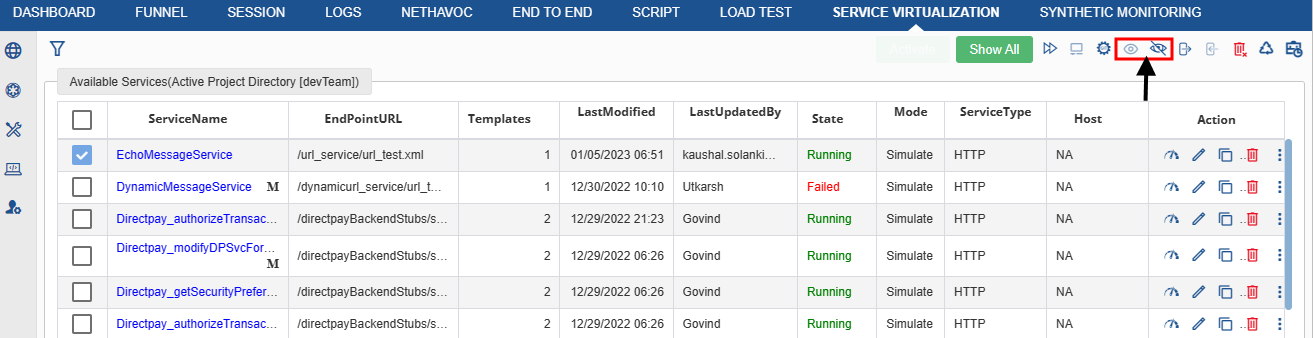
  1. Select any service and click the Start/Stop button on Service Virtualization Services
  2. If selected service is enabled, then Disable button appears and if user clicks on it then it disables the selected service.
  3. If selected service is disabled, then Enable button appears and if user clicks on it then it enables the selected service.
  4. User can verify it in last column of table which displays state of service ‘enable/disable’.

To Move Selected Service(s) to Recycle Bin

On clicking this icon, a user can move a selected service to the recycle bin.

Figure 18: Recycle Bin

Once user click this icon, a pop up messages appears as shown in the figure to confirm whether file is needed or not.

Figure 20: Recycle Bin Confirmation message

Global Scale Service Time

It specifies the percentage by which to multiply all of the service time in a virtual service. To access this click on Global Scale Service Time icon  as shown in below figure.

Figure 22: Scale Service Time Icon

Once user click the icon, following window appears.

Figure 23: Global Scale Service Time

Left Panel

It contains following menu represented with icons:

Figure 24: Left Panel Icons

Icon

Meaning

Description

Services

It is used to navigate to the services to add, manage, and record a service.

Request Trace

It is a log for request and response user captured for services.

Configuration

It is used for various configurations, such as URL settings, HTTP settings, SSL settings, and so on.

Reactive Replay

Reactive replay is the replay of access log data based on the session id provided in the request. Initially, raw data files/access log files are required, which are provided by user.

Admin

User can configure groups, users, projects, and servers.

  • Filters: Click on the icon for the fields in the service virtualization window as shown in below figure.
Figure 25: Filter Icon

Once user click the filter icon, following page opens.

Figure 25: Filter Option

Following fields need to be selected to apply the filter:

  1. Service Name: Unique name of the service. In this we have the following option to select:
  • All
  • HTTP
  • JDBC
  • EJB Call
  • Spring Remoting
  • Java Class
  • JMS
    1. State: Select whether user want all state or just want to enable or disable the fields.
    2. Mode: It defines the mode for the type of service. The following modes are listed below:
  • All
  • Simulate
  • Forward
  • Mixed
    1. Last Modified: The date and time when this service was last modified.

Details of left panel icons are discussed later in this module.

Right Panel

  1. On the Services menu, click the Manage menu item to get list of services under the services table.
Figure 26: Manage Service page

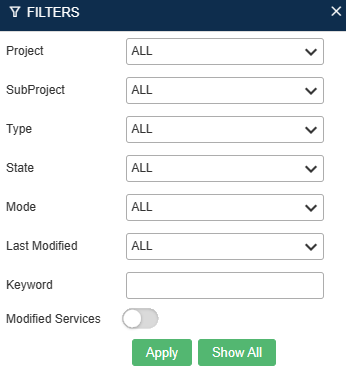
Following fields are displayed :

  • Service Name: The unique name of the service.
  • EndPointURL: It is the web address (URL) at which the clients of a specific service can gain access to it.
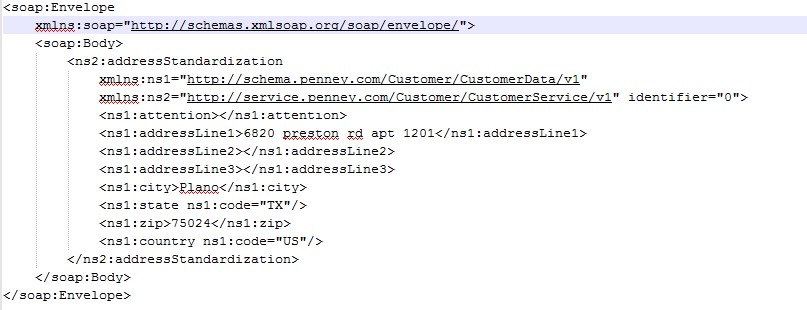
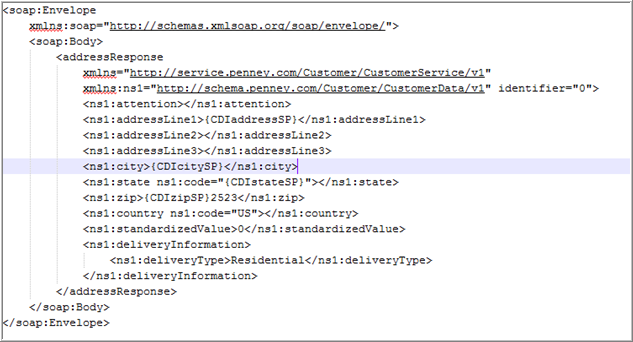
  • Templates: Template uses various parameters to send the appropriate response based on the request data.
  • LastModified: It defines the date and time when this service was last modified.
  • LastUpdatedBy: It defines the user which has last updated the services.
  • State: It defines the state of the service i.e:
    • Running: This state indicates that the service is running.
    • Stopped: This state indictaes that the service is stopped.
  • Mode: It defines the mode for the type of service. The following modes are listed below:
    • Simulate: It is the request for the same server.
    • Forward: It supports the ability to forward the request to another endpoint.
  • ServiceType: It is the type of protocol in which the service runs. There are following service types available:
    • TCP: It is a standard of communication that enables application programs and computing device to exchange message over the network.
    • HTTP: It is a communication protocol that is used to connect to Web servers on the internet or on a local network.
    • JMS: Java Messege Service is an API that provides the facility to create, send and read messages.
  • Host: Hostname or IP address of the backend server or endpoint server is the server from where the response is captured to the Service Virtualization.
  • Action: In Action, there are following options which are listed below:
  • To Edit Service: Click the edit It is used for editing an exsiting service.
  • To Copy Service: Click the to copy. It is used to make a copy of an exsiting service for creating a new service.
  • To Move Selected Service(s) to Recycle Bin: Click the icon. It is used for moving a selected service to the recycle bin.
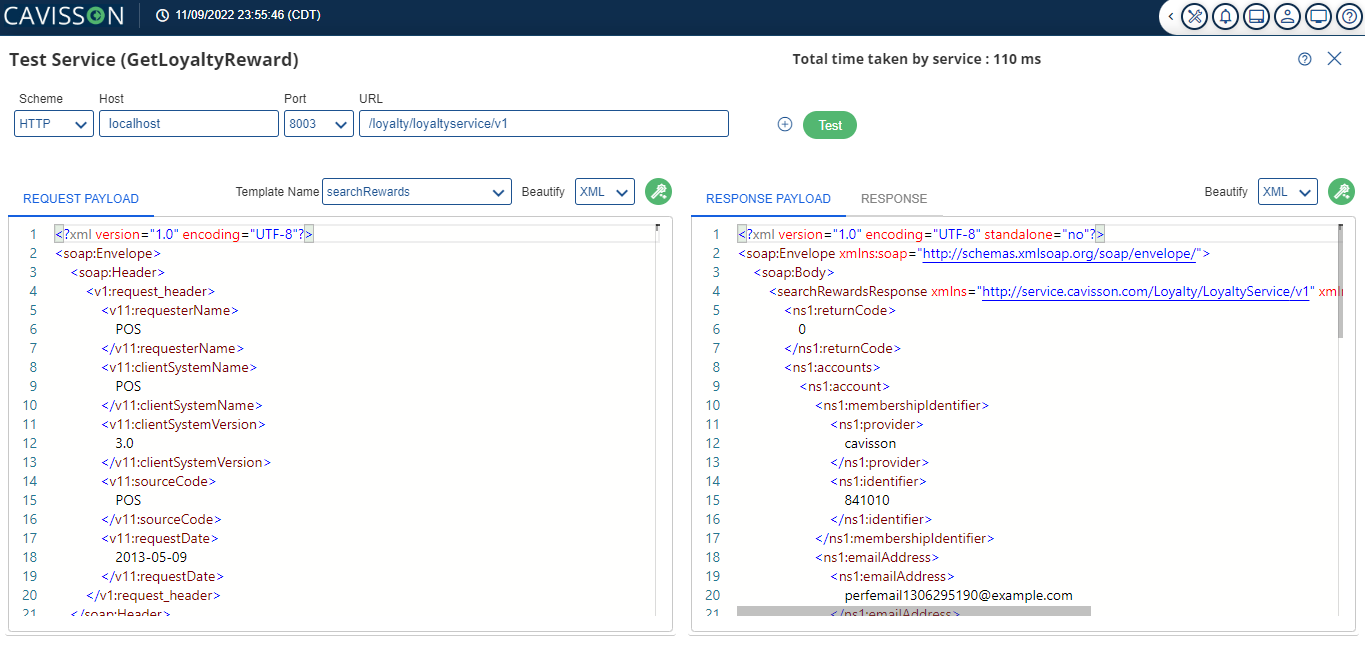
  • Test Service: Test service allows user to test a service on the virtual server where the service is hosted. It is recommended to do a quick validation of service before using it in Load/Performance testing.
Figure 26: Test Service
  • In Test Service once user click the icon, there are the following fields which are described below:
  • Scheme: Defines the protocol for sending a request. It can be HTTP or HTTPS.
  • Host: It is the virtual server host.
  • Port: The port where the service is running.
  • URL: The end-point URL for the service.
  • Query: request
  • Additional Headers: User can add additional headers, if required. This is optional.
  • The user has to click on the Test button to test the service.
  • Request Payload: A request payload displays the request payload only.
  • Response Payload: A response payload displays the response payload only.
  • Template Name: In this field user can select the template which is to be tested.
  • Beautify: It allows user to format or beautify the requests and response in a well-structured format, supported following format:
  • Text
  • CSS
  • HTML
  • JavaScript
  • XML
  • JSON

On clicking the kebab menu icon in action  as shown in the figure below, we get following option which were already discussed above in Top Panel.

Figure 28: Action Menu icon
  • Activate Service
  • Scale Service Time
  • Export Service