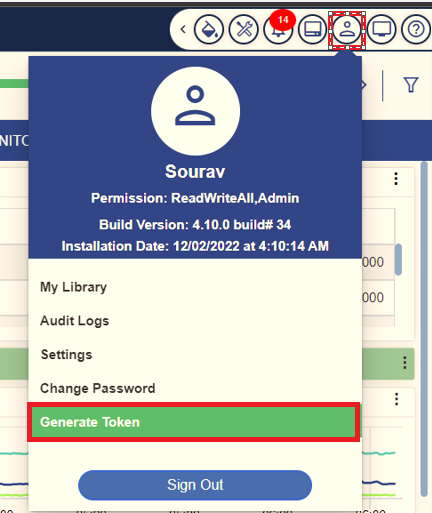
An Admin user can configure the Profile setting and Email/SMS setting. To view the Settings option, navigate to User Options ![]() , and click the Settings option.
, and click the Settings option.


- Sender E-Mail Address: It is the field which displays the email address of the sender.
- Send Mail To: In this field, the user has to provide the mail address of the sender.
Note: After filling up all the details in the mail configuration fields, the user has to click on the Send Test Mail ![]() button in order to test the mail configuration. Once the user clicks on the test button, a confirmation message will be displayed.
button in order to test the mail configuration. Once the user clicks on the test button, a confirmation message will be displayed.

SMS Configuration
In SMS Configuration, the user can choose any one of the following options in order to configure SMS:
- Standard: In standard, there are the following options from which the user can select as per their needs which are listed below:
AT&T
- T-Mobile
- Verizon
- Sprint
5. Virgin Mob
6. Tracfone
7. Boost Mobile
8. Metro PCS
9. Cricket - Nextel
- Alltel
- Ptel
- Suncom
- U.S. Cellular
- Custom SMS Gateway Domain: If a user selects this option, then they can send SMS through a customized gateway domain.
- Send SMS To: In this field, the user has fill the destination mail address to which they want to send the mail.
Note: After filling up all the details in the SMS configuration fields, the user has to click on the Send Test SMS ![]() button in order to test the SMS configuration. Once the user clicks on the test button, a confirmation message will be displayed.
button in order to test the SMS configuration. Once the user clicks on the test button, a confirmation message will be displayed.
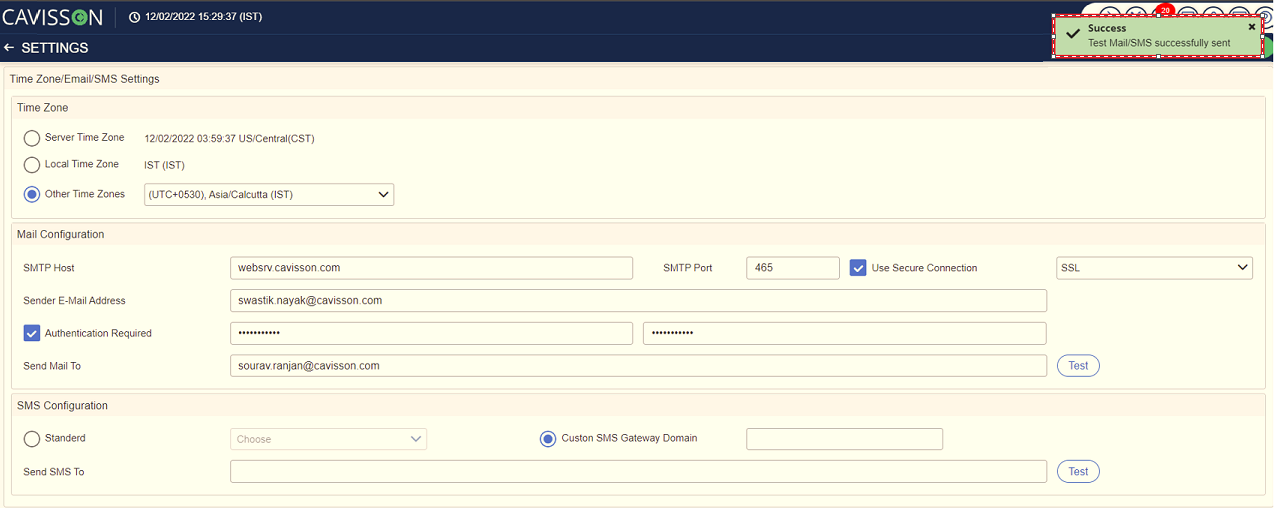
Note: Once the user has successfully entered all the fields, they have to click on the Save![]() button to save the configurations.
button to save the configurations.
Change Password
This option is used for changing an existing user password. To change the current password, navigate to User Options![]() , and click the Change Password option.
, and click the Change Password option.
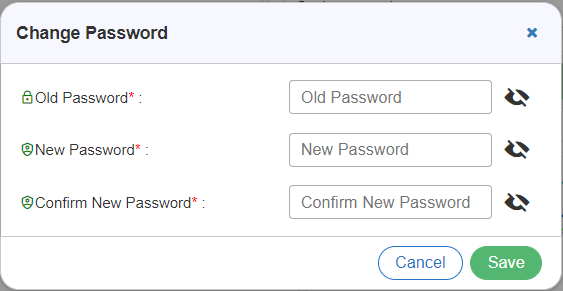
In the change password dialog box, there are following three fields which are listed below:
- Old Password: In this field, the user has to enter their existing old password.
- New Password: In this field, the user has to enter a new password which they want to create.
- Confirm New Password: In this field, the user has to re-enter the new password which they had created for the confirmation.
Notes:
- After the user has entered all the fields, the user can save the information by clicking on the Save
 If the user does not want to save the information, they can click on the Cancel
  button.
- A user can also show/hide the fields. To hide the field, the user has to click on the Hide Password
 To show the field, the user has to click on the Show Password
  option.
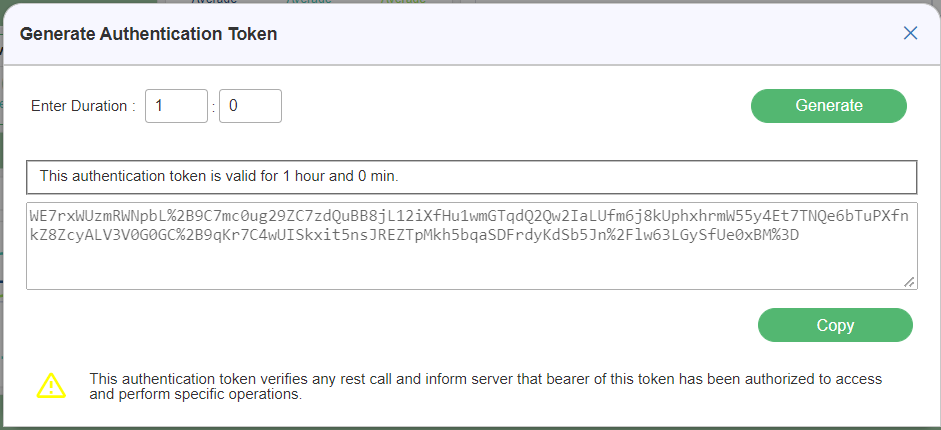
Generate Token
This option is used for verifying the authentication token for any REST calls and informs the server that the bearer of this token has been authorized to access and perform a specific operation. To generate a token, navigate to User Options , and click the Generate Token option.
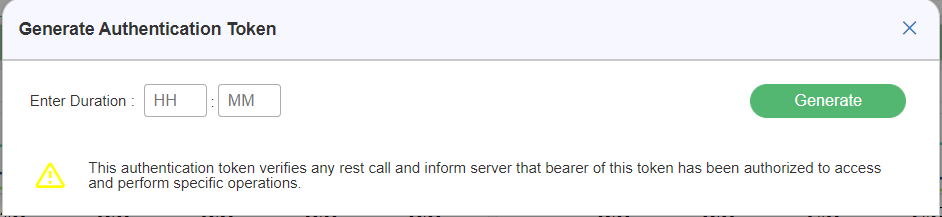
In the Generate Authentication Token dialog box, the user has to fill the Enter Duration field by providing the Hours and Minutes value. Once the user has entered the values in the corresponding fields, the user has to click on the Generate ![]() button in order to generate the token.
button in order to generate the token.
Note: Once the user clicks on the Generate ![]() button, a token will be generated with a validation message as shown in the below figure. The user can also copy the generated token. To copy a token, the user has to click on the Copy
button, a token will be generated with a validation message as shown in the below figure. The user can also copy the generated token. To copy a token, the user has to click on the Copy![]() button.
button.