For details of fields in Manage Service , refer to Right Panel.
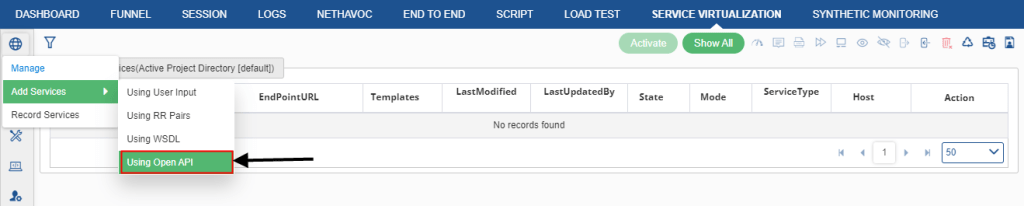
Manage Service can be done using the following:
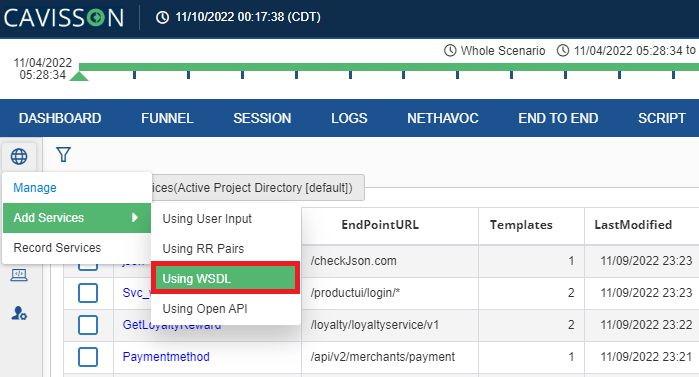
- Using Templates
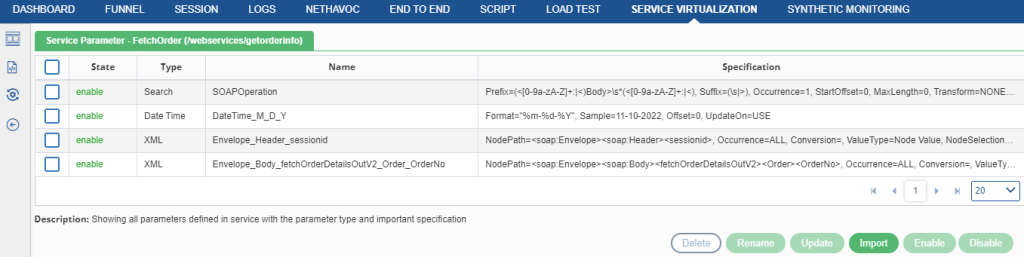
- Using Service Parameters
- Using Service Settings
Template Settings
Using Templates
Template is used for defining the response of the service. By default, every service has one template, which is used for the response of the service. One service can also have more than one response based on the request or the test conditions. In this case, the user needs to add multiple templates. Another situation is when the service has two responses – one for a successful response and one for an error response. In this case, the user needs to define two templates. In case of multiple templates, they need to provide condition logic for the selection of the template for the service response. Service Virtualization evaluates the condition of all the templates in sequence and uses the first template whose condition is met. If there are no templates with the matching conditions, then no response is sent. Users can have one template with no condition which becomes the default template in case no condition is met.
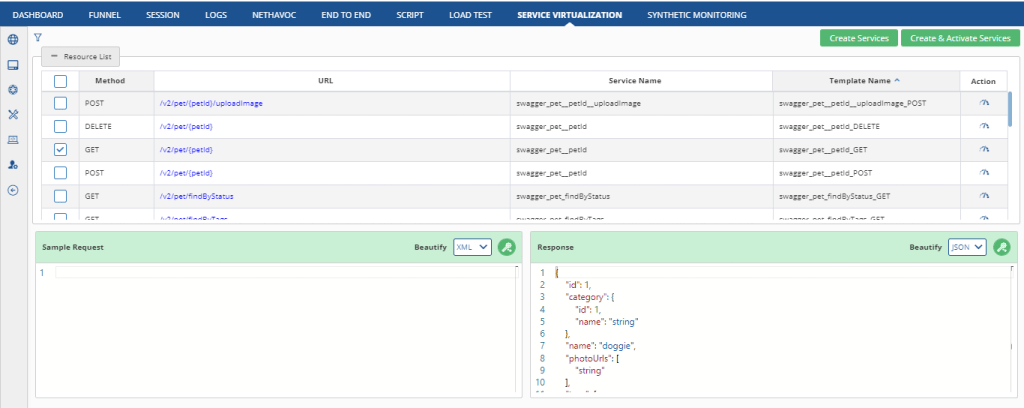
Adding a Template
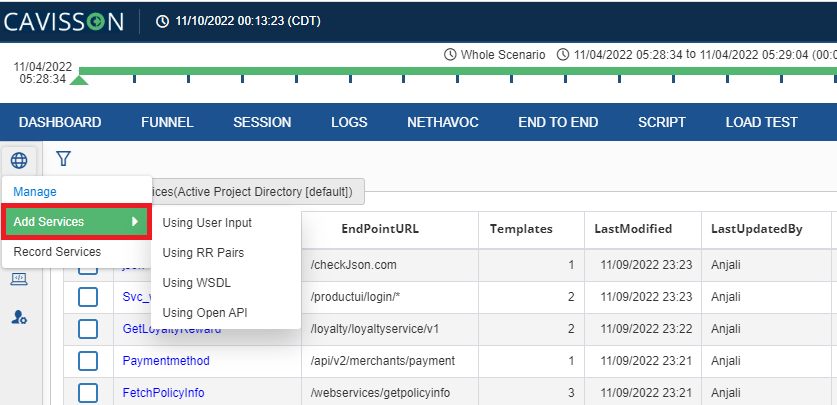
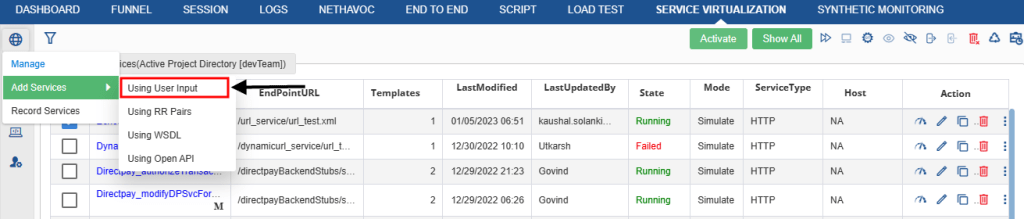
Click the Templates Settings menu ![]() as shown in the below figure
as shown in the below figure

Note: An user can adjust the width of table columns. If the table width exceeds the screen width, a horizontal scroll bar is displayed at the bottom. This allows the user to view the conditions which exceed the column width.
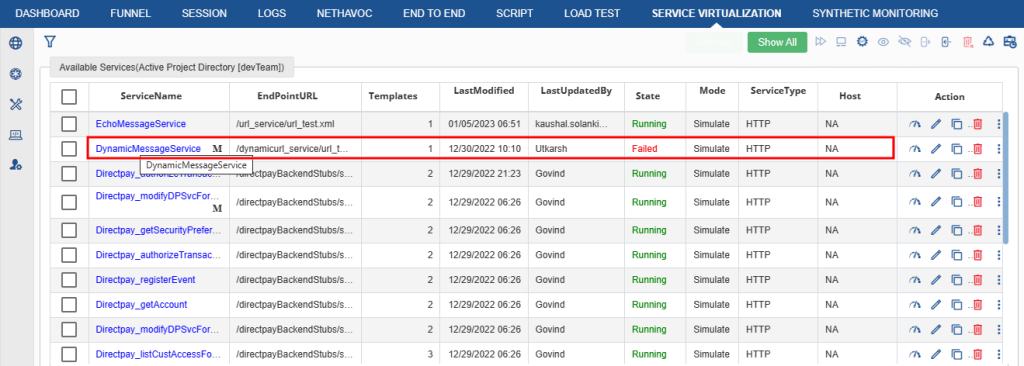
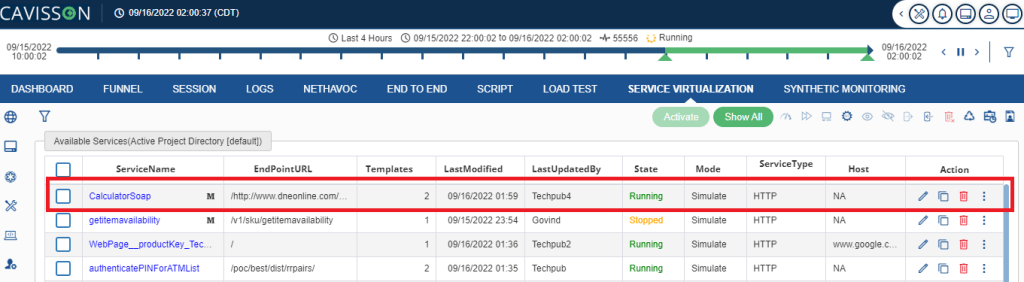
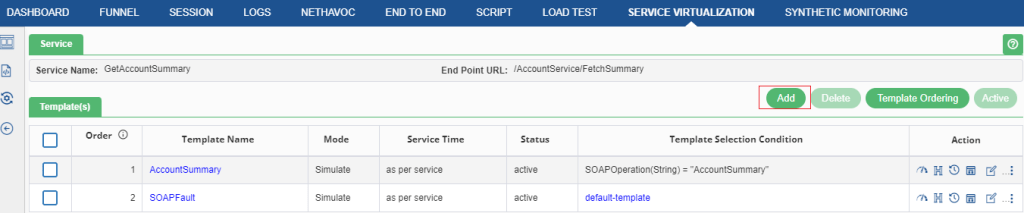
Service
In Service, there are following two fields:
- Service Name: In the service name, the user can see the name of the service whose template they can configure.
- End Point URL: In the end point url, it shows in which URL the service is running.
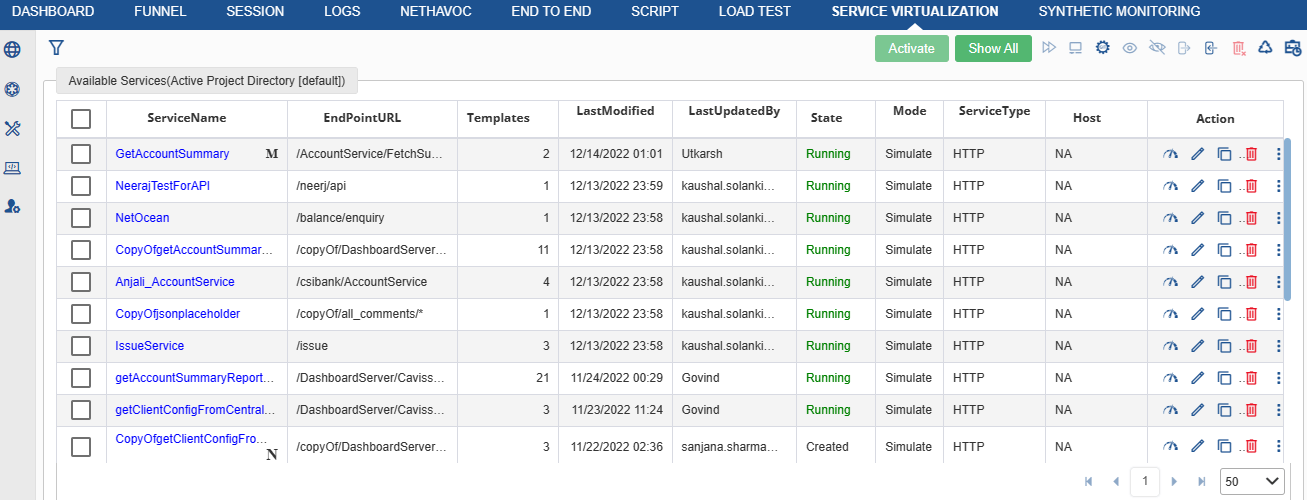
Template(s)
In Template(s), there are following fields:
- Order: Shows the order in which the condition will be evaluated.
- Template Name: It is a list that contains the number of templates available in the current service. The response comes from the selected template.
- Mode: There are two types of modes:
- Simulate: This template type indicates the simulation of service on the server. If the template type is ‘Simulate’, then the virtual server responses to the request.
- Forward: This feature is used to forward a request from the virtualized server to a specified endpoint.
- Service Time: Used to set the service time delay for static and correlated URL.
- Status: Shows the status of the job. The status can either be Active or can be Inactive.
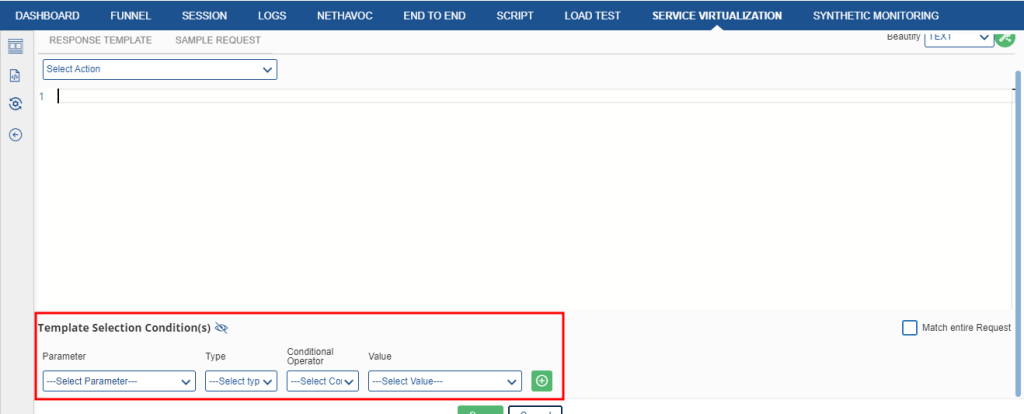
- Template Selection Condition: It shows the conditions applied to the template. There will be one default template in this list.
- Action: In action, there are the following options:
- Template Based Test
 : This option is used to test the response at the template level. For details refer to Test Service(Action) in Right Panel.
 - Template Based Header
 : This option is used to add a header in templates.
 - Template Based Service Time
 : This option is used to add service time in templates.
 - Template Based Trace Level
 : This option is used to add a trace level to a specific template.
 - Update
 : This option allows the user to update or edit the template.
 - Forward: This feature is used to forward a request from virtualized server to a specified endpoint.
- Template Based Content Length Indicator: This indicates the length of the content. Enabling this will indicate the content length of the template.
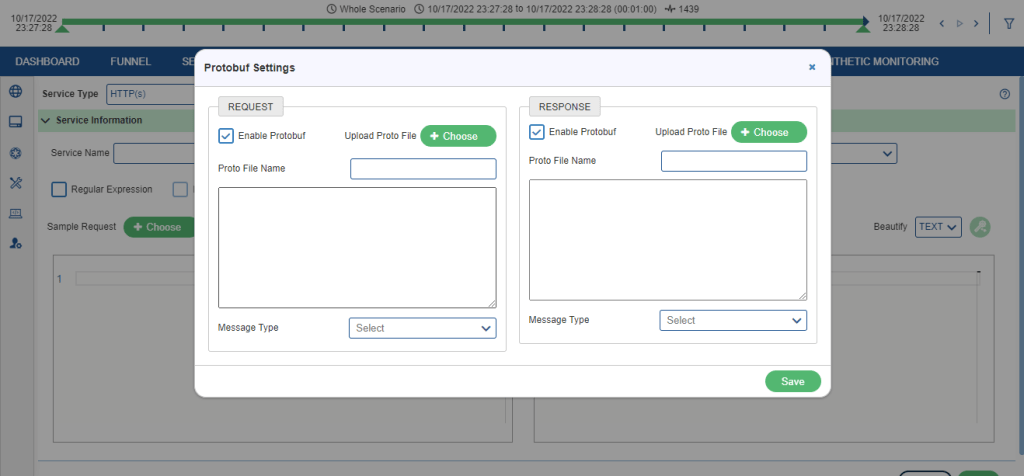
- Protobuf Settings: Here user can change or add the protobuf settings if required.
Note: User needs to click on the check box of the template to delete or inactive the template.
Adding a Template
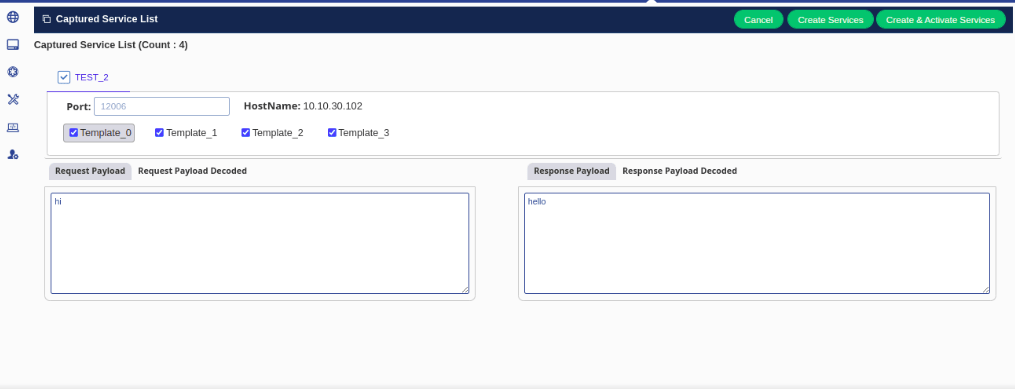
The template is used for defining the response of the service. By default, every service has one template, which is used for the response of the service. One service can also have more than one response based on the request or the test conditions. In this case, the user needs to add multiple templates.
Click Add button ![]() to add a new template.
to add a new template.
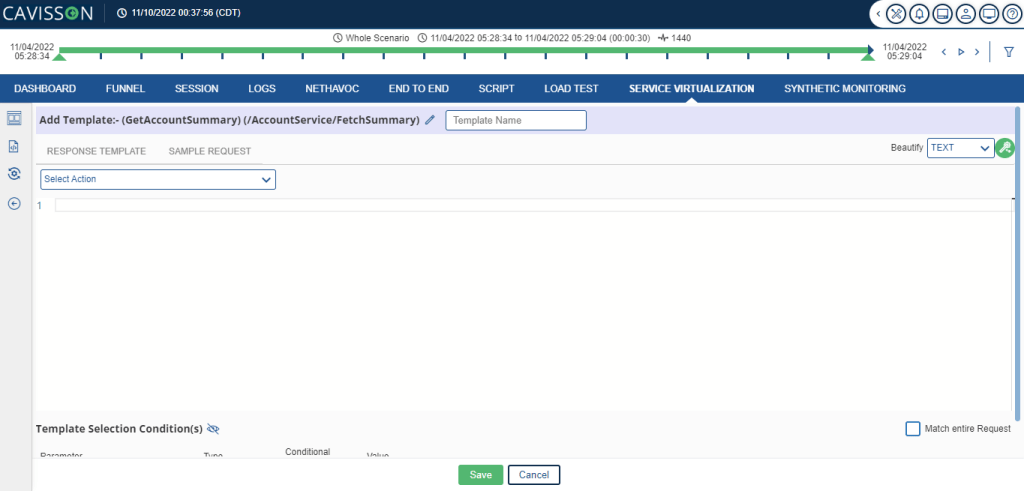
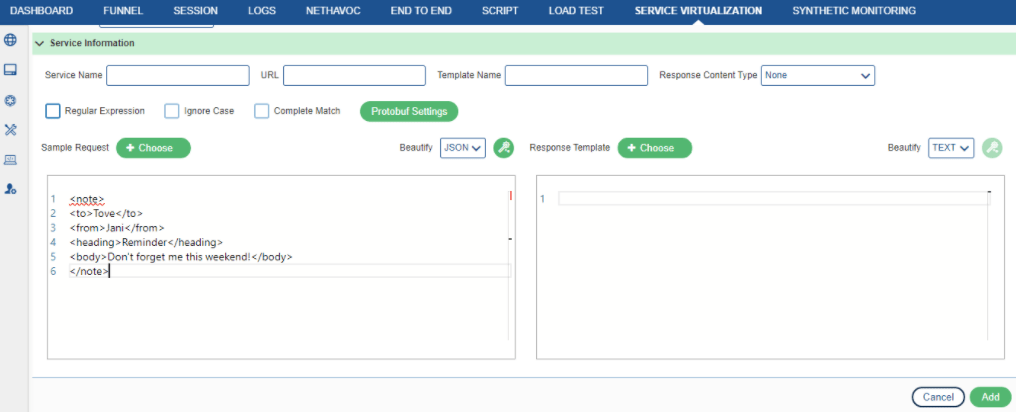
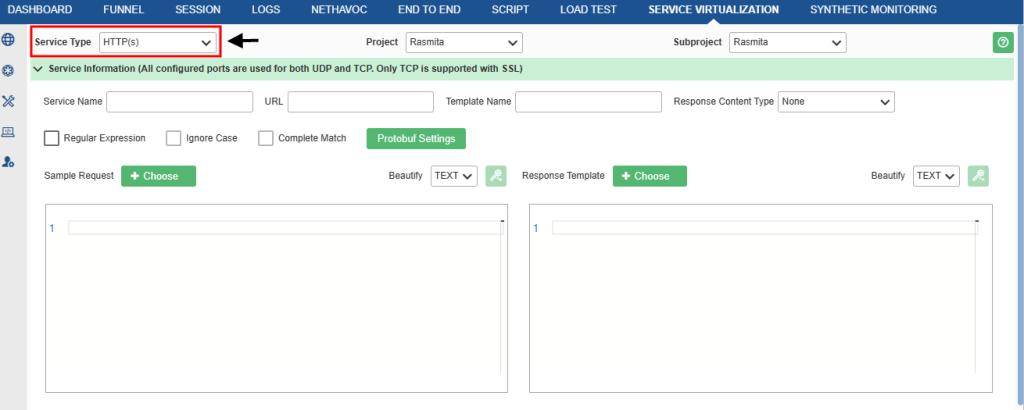
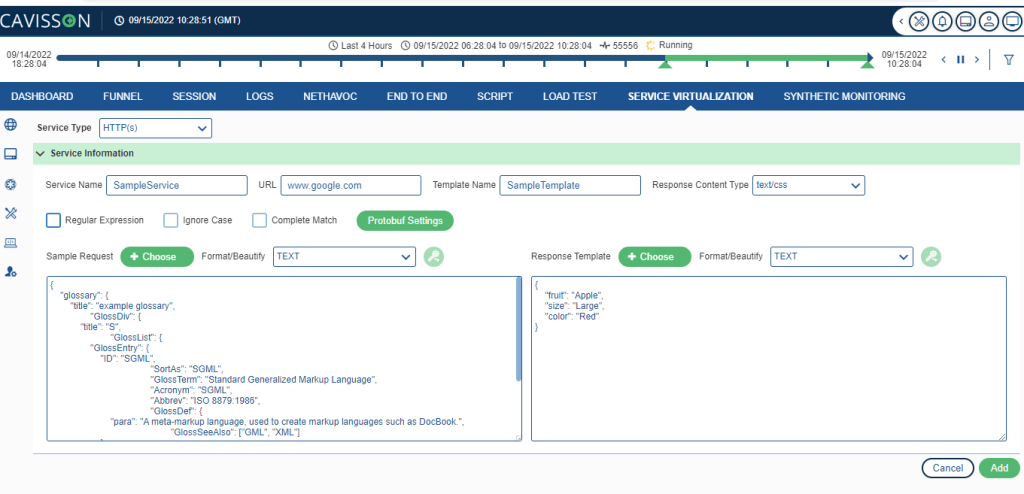
To add a template, enter the following fields:
- Template Name: Enter the template name in this field. It is the unique name of the template within this service.
- Response Template: It is the response of the service for this template. User can parameterize it later using different types of parameters. From the drop-down they can select the following action:
Note: Once a user selects any parameter, their corresponding parameter name will
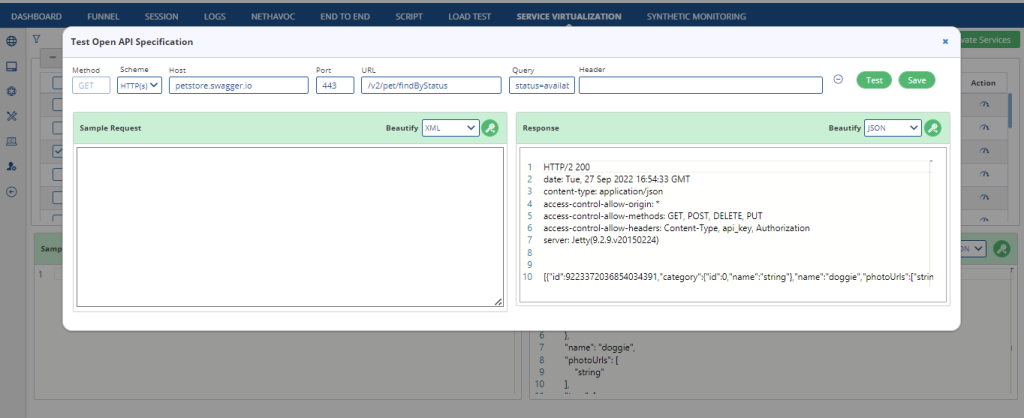
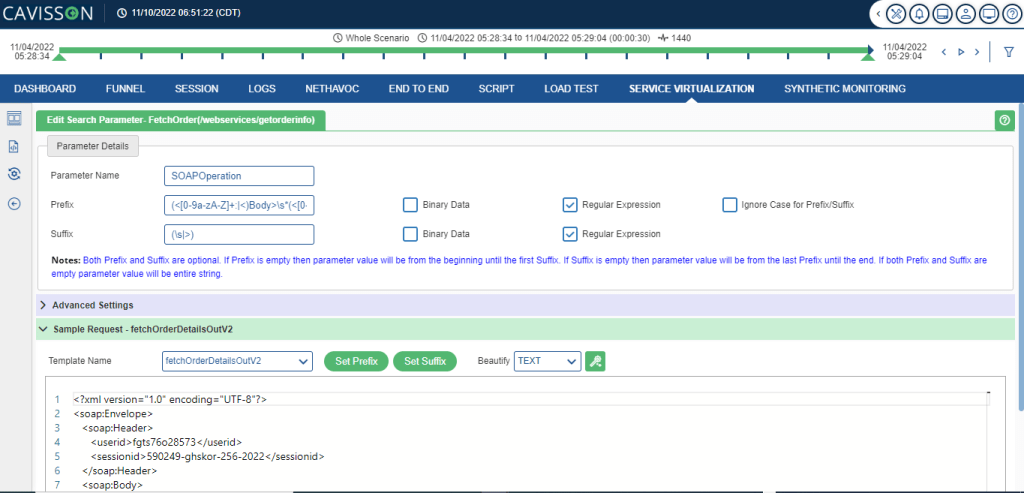
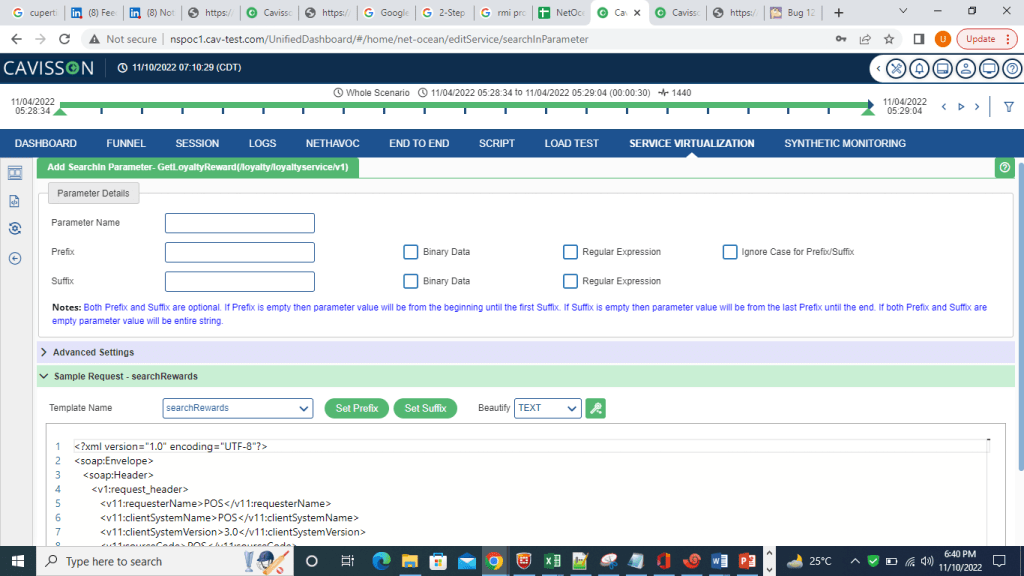
- Sample Request: Sample request of the service. This is used for testing and for selection of Prefix and Suffix in Request Parameters.
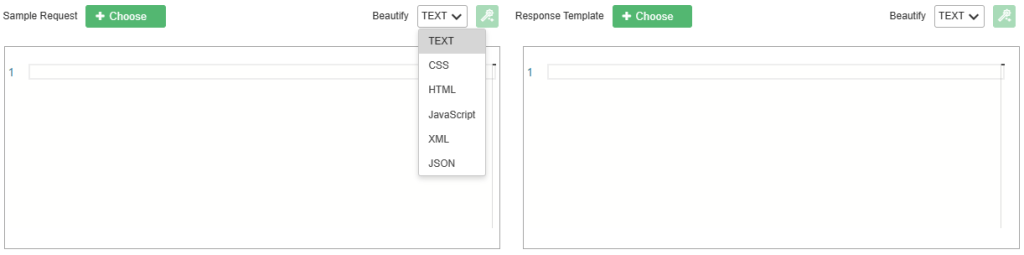
- Beautify: Click the beautify icon (
 ) which formats the content. From the dropdown select either CSS, Text, HTML, Javascript, XML, Json as per the requirement.
 - Action: User has the following actions type in response template and their corresponding sub fields:
- Replace selected text by parameter: Select this option and from the corresponding sub fields select the name of the parameter name for replacing. On selecting this option, the selected text will be replaced by a parameter.
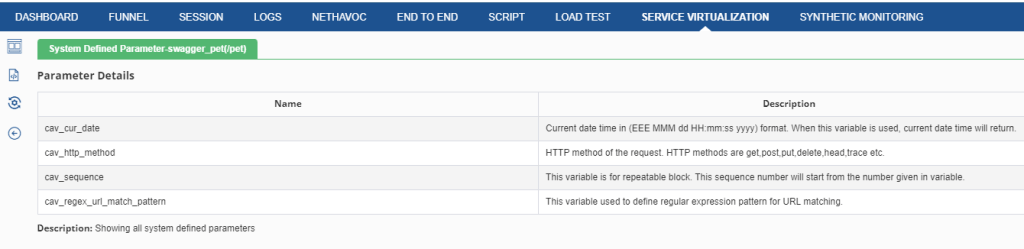
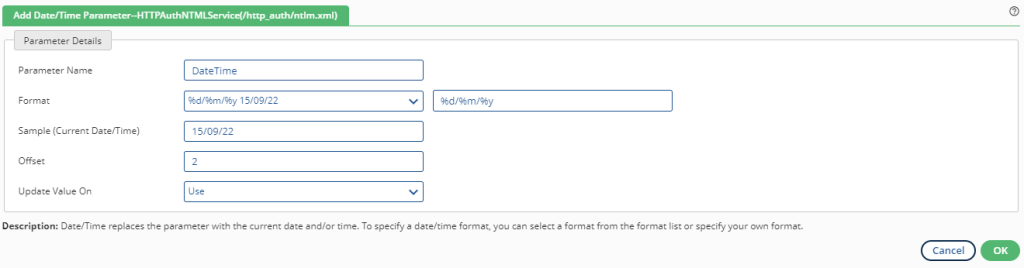
- cav_cur_date: It will replace the selected text with the date parameter.
- cav_http _method: It will replace the selected text with http methods.
- cav_sequence: It will replace the selected text in a particular sequence.
- cav_regex_url_match_pattern: It will replace the selected text with the URL pattern.
- SOAPOperation: Replace the selected text with SoapOperation.
- AccountSummary_Request_VAR_Associate_Number: It will replace the selected text with the account summary request VAR Associate Number.


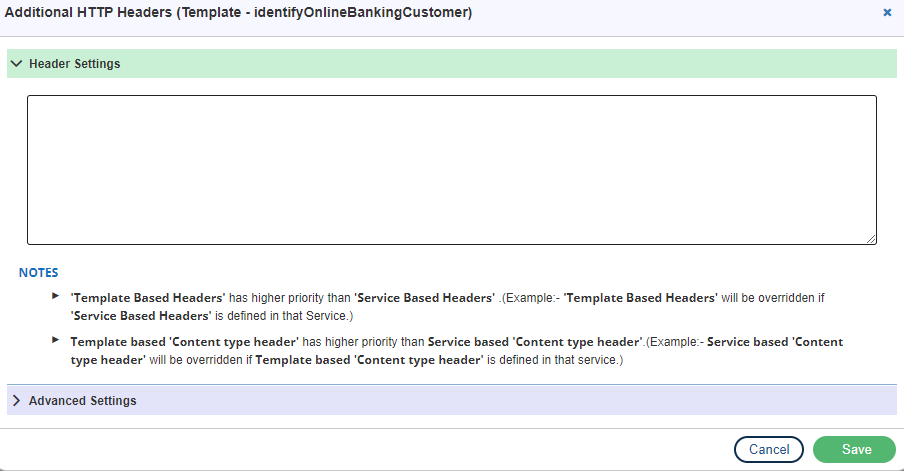
Note
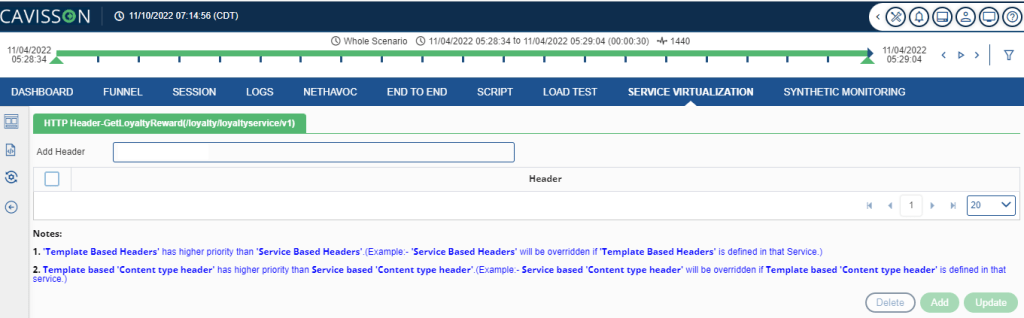
- ‘Template Based Headers’ has higher priority than ‘Service Based Headers’.(Example:- ‘Service Based Headers’ will be overridden if ‘Template Based Headers’ is defined in that Service.)
- Template based ‘Content type header’ has higher priority than Service-based ‘Content type header’. (Example: – Service-based ‘Content type header’ will be overridden if Template- based ‘Content type header’ is defined in that service.)
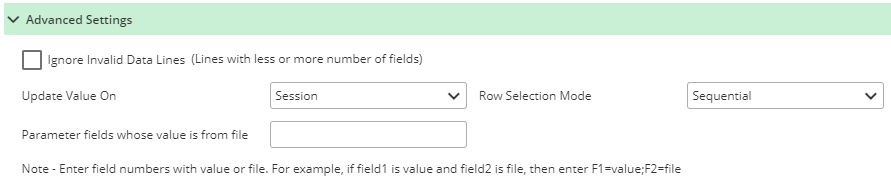
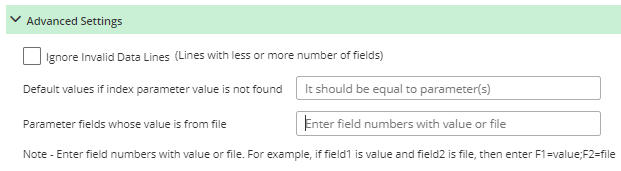
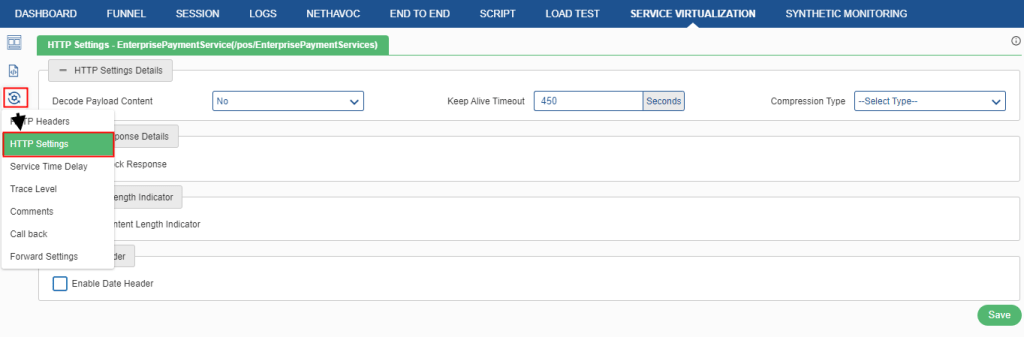
Advanced Settings
- Content Type: Here user can select the content type for their header. The Content Type property of header specifies the HTTP content type for the response. If no Content Type is specified, the default is text/HTML.
- Compression Type: User can compress the response by using compression types – Deflate, Gzip, and BR. Selected compression type format is displayed under the Response Template.
- HTTP Status Code: User can configure the percentage of the selected HTTP Status code to be reflected in the response of the service.
- Enable Date header: Here user can enable date header it will help indicating the date in the header.
Add Template based Service Time
Response time delay or service time delay is the time taken between request sent by the client and the response received by the client. The user can check the time delay between client and server and see its value.
Service Virtualization sends response of the service as soon as the request is received. Therefore, there is no delay in the Response. User can add service time delay by using Service Time Delay settings. To add template based service time, click the ![]() icon on the templates page. A pop-up window is displayed to add service time delay.
icon on the templates page. A pop-up window is displayed to add service time delay.

To use template based service time, select the Enable Service Time check box.
There are following options under this section:
- No Service Time: No service time delay is applied. Helps in doing max load testing.
- Exponential Random Service Time: Exponential random service time with a median of specified seconds is applied. This takes a random value equivalent to median time.
- Constant Service Time: A constant service time of specified seconds. Helps in doing controlled tests.
- Random Service Time: It is more realistic. The value is a random value between the minimum and maximum time defined. Min should be less than or equal to Max.
Click Save.
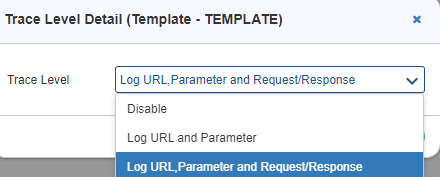
Add Template based Trace level
Service Virtualization logs important messages which are called traces. A trace level is used to determine which events the trace provider generates. To add template based trace level, click the ![]() icon on the templates page as shown in the below figure.
icon on the templates page as shown in the below figure.


Once the user selects the Enable Content Length Indicator check box, more options are displayed.
- Mode: There are two modes – ‘disable’ and ‘enable’ to specify whether the features should be disabled or enabled.
- Chunk Scheme: There are two chunk schemes:
- Size of Chunk: It displays the size of the individual chunk.
- Number of Chunk: It displays the number of chunks in which the response should be served.
- Default Size of chunk: It displays the default size of chunks in Bytes, by default the size is 1440.
- Default Number of chunks: It displays the default number of chunks.
- Size of chunk: The check box for Default size of chunk/Default number of chunks is selected by default. The user must clear the check box to enter a value other than the default value. Click Save.
The default size of a chunk is 1440 bytes and the default number of chunks is 2. |
Sequence shows the order in which the conditions will be evaluated. Template with the first matching condition is used for response. Default template (one without condition) is used if no other conditions match.
Note: With Template Ordering button, the user can change the sequence number of the templates in a virtual service. It helps them to simulate their services as per priority.
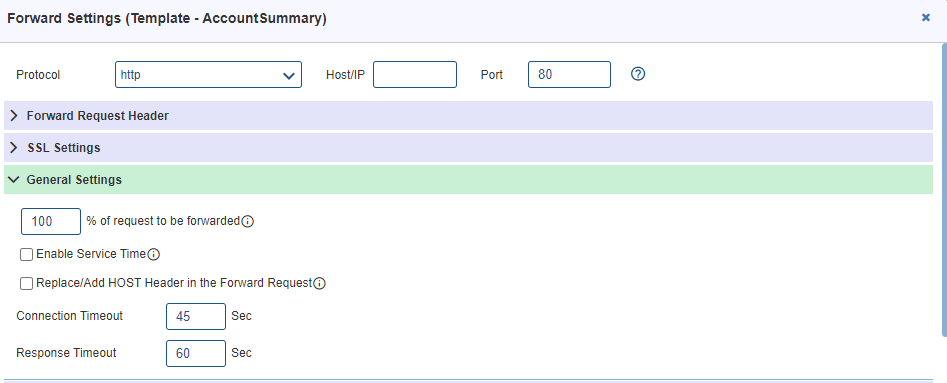
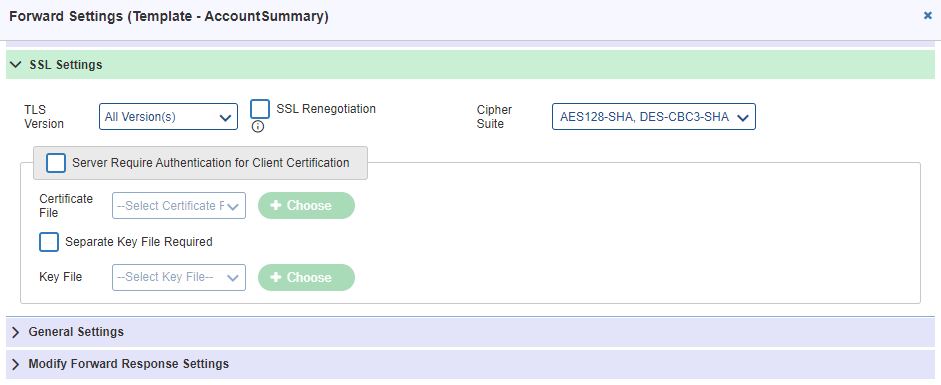
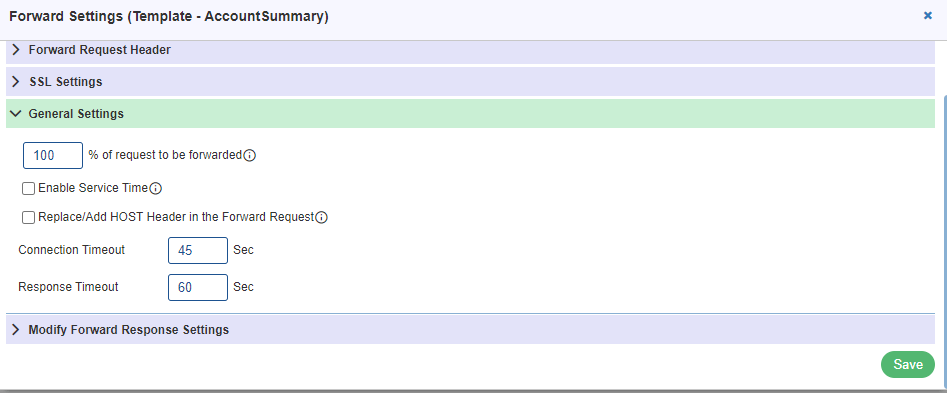
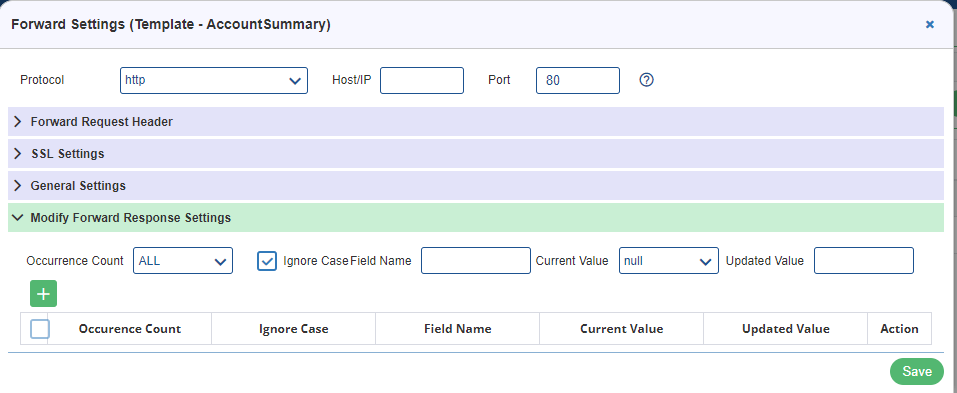
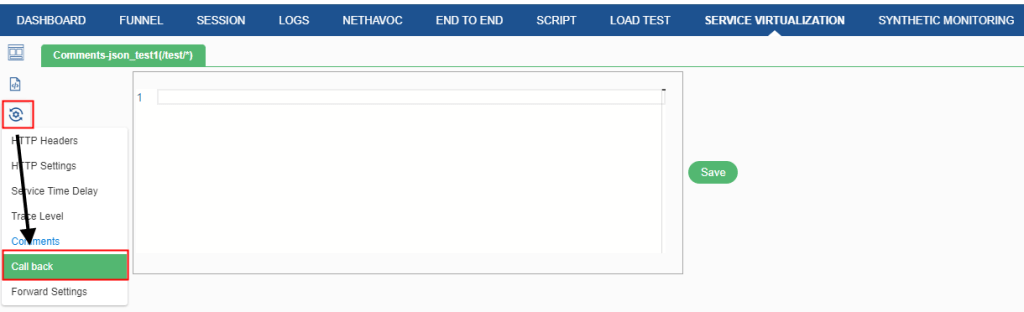
Forward
The forward settings are used to enable/disable the forward requests. The requests are forwarded to the next server (whose server details has to be provided in the forward text field) to serve the response. To access Forward Settings, click on the kebab icon on the action menu and select Forward as shown in the below figure.

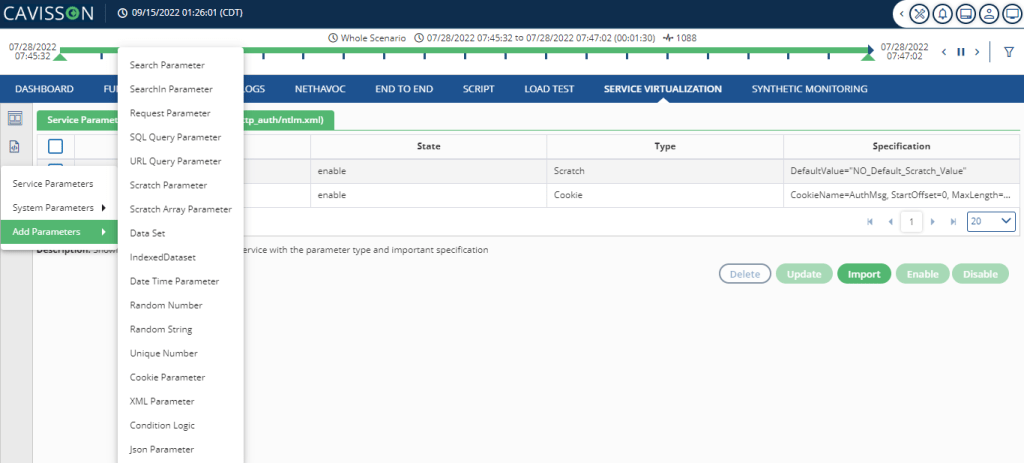


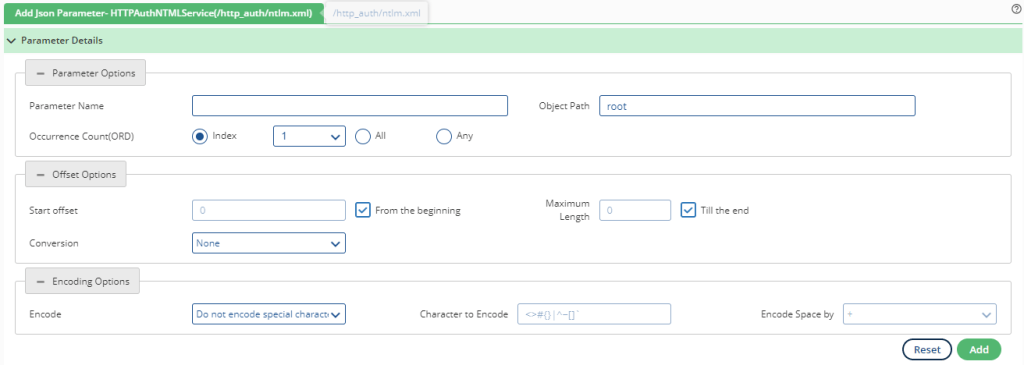
Following are the properties of JSON parameter:
- Parameter name: Parameter name is the name of JSON variable being defined. It’s a mandatory field. This name must be unique among all parameters in the service. It must start with an alphabet and after alphabet, user can use number and underscore. Maximum length should be of 64 characters.
- Object Path: Specify the full path of the node for which the user needs to fetch the value. For example, in below JSON, user needs to get the value of node email then JSON Node Path should be “root.email”.
Note: JSON path should start with “root.”.
Request of JSON: –
“expand”: “attributes”,
“link”: {
“rel”: “self”,
“href”: “http://localhost:8095/crowd/rest/usermanagement/1/user?username=my_username”
},
“name”: “my_username”,
“first-name”: “My”,
“last-name”: “Username”,
“display-name”: “My Username”,
“email”: “user@example.test”,
“password”: {
“link”: {
“rel”: “edit”,
“href”: “http://localhost:8095/crowd/rest/usermanagement/1/user/password?username=my_username”
}
},
“active”: true,
“attributes”: {
“link”: {
“rel”: “self”,
“href”: “http://localhost:8095/crowd/rest/usermanagement/1/user/attribute?username=my_username”
},
“attributes”: []
}
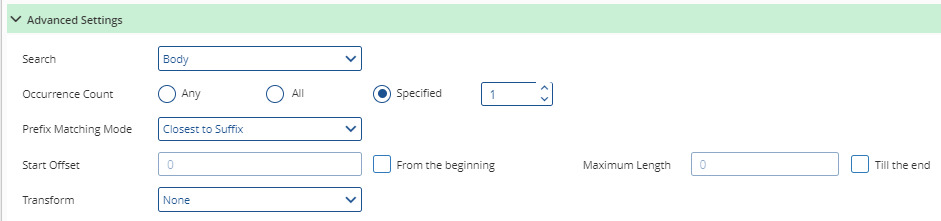
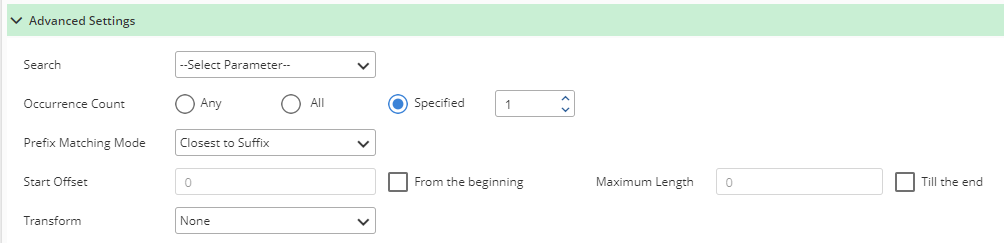
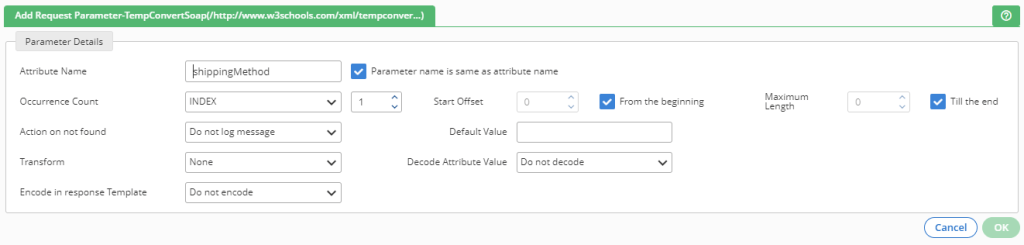
- Occurrence Count: It is required if multiple occurrence found of specified node. User has three options for this.
- Index: By selecting this user can define which index of occurrence need to pick.
- All: If user selects this option then system takes all occurrence of the specified node.
- Any: It takes randomly any one occurrence out of all.
- Start Offset: This option is used to indicate the starting of the offset. By default, it is set to 0.
Note: If the user wants the set the offset to be set from the beginning, then the user has to click on the From the Beginning checkbox.
- Maximum Length: This option is used to indicate the maximum length of the offset. By default, it is set to 0.
Note: If the user wants the maximum length to be the end, then they have to click on the Till the End checkbox.
- Conversion: This option is used to encode search pattern. It has three options.
- None: In this option, no encoding is applied.
- HTMLToURL: It converts HTML-encoded data to a URL-encoded data.
- HTMLToText: It converts HTML-encoded data to plain text format.
- TextToUrl: It converts TEXT-encoded data to URL format.
- UrlToText: It converts URL-encoded data to plain text format.
- UrlToHtml: It converts URL-encoded data to HTML text format.
- TextToHtml: It converts Text data to HTML text format.
- TextToBase64: It converts Text data to Base64 format.
- Base64ToText: It converts Base64 data to Text format.
- Encoding Options: Encoding is used to encode special characters to their ASCII Users can encode any number of special characters i.e. all, specific, or none. User can have the following options:
- Encode all special characters except (+), (-), (.), (_): All special symbols except + -. _ are encoded. It is the default value.
- Encode only specified characters: The user can specify which special characters to encode in Characters to encode
- Do not encode special characters: None of the special characters is encoded. However, space is encoded always.
- Character to Encode: This option will be enabled in case of Encode Only Specified Character option. In this field, the user has to provide the character to be encoded.
- Encode Space by: This option specifies to Service Virtualization how to encode Space. User can have two options: ‘+’ or ‘%20’. If ‘+’ is chosen, Service Virtualization encodes Space by ‘+’ and if ‘%20’ is chosen, Service Virtualization encodes Space by ‘%20’. The default value is ‘+’.
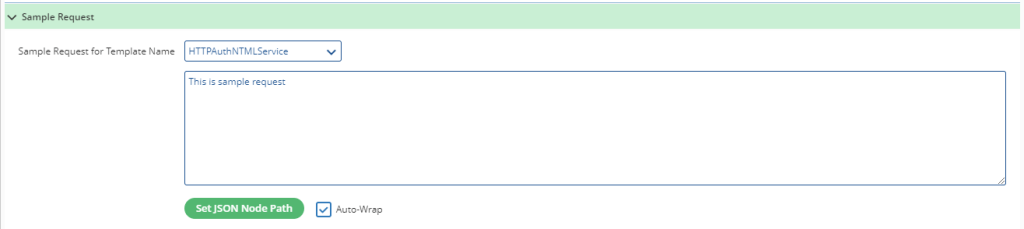
- Sample Request for Template Name: Here user can view sample request contents of any template by selecting in to a dropdown. We are displaying the sample request here to help user to specify the node/attribute.
- Set JSON Node Path: This button is to help user to get the complete path of the node and set in to Object Path by selecting any node.
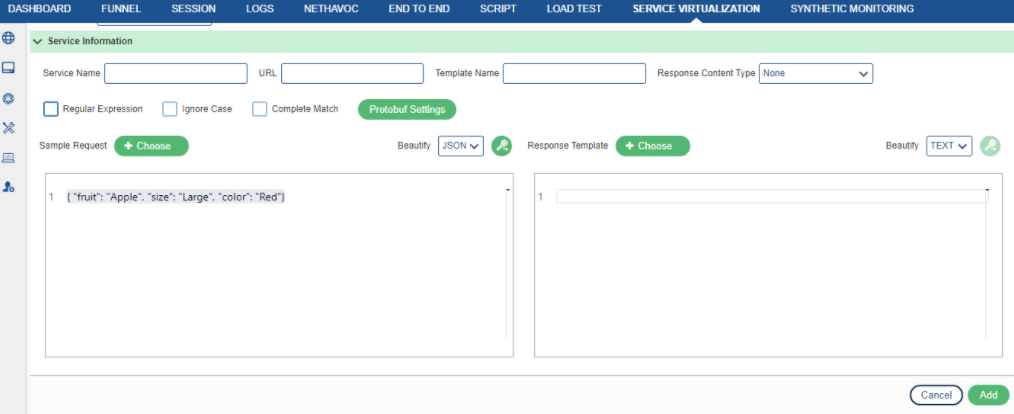
- Beautify: It is used for formatting or beautifying the sample requests and response templates in a well-structured format.
Service Settings
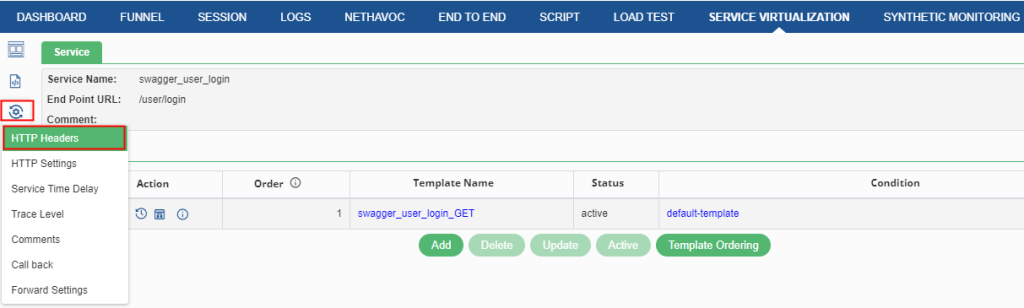
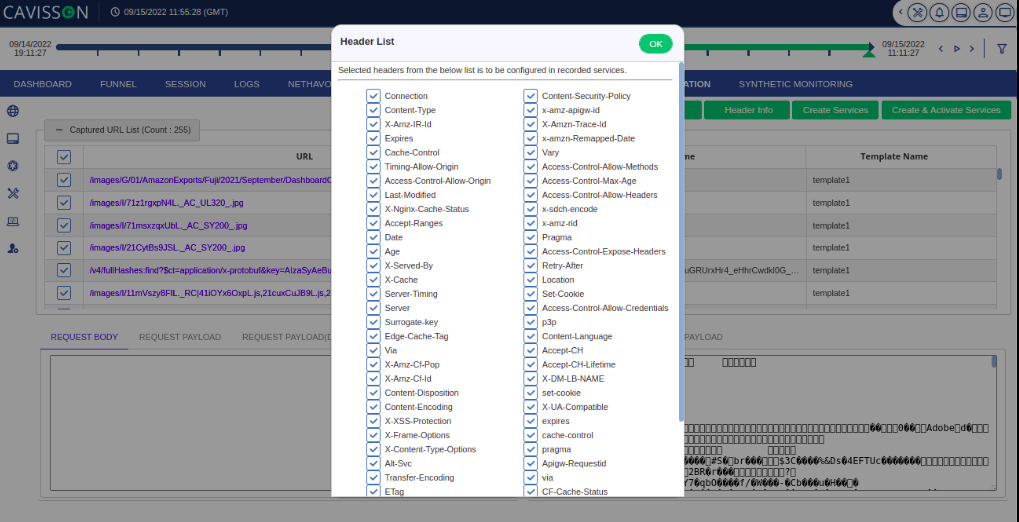
HTTP Headers
An HTTP header is a field of an HTTP request or response that passes additional context and metadata about the request and response. Service Virtualization sends following headers in the service response:
- Content-Length
- Content-Type – If content type was selected for the template.
- Any additional header specified in global header files.
- Any header added using C API used in the callback methods.
Using HTTP header setting, user can send additional HTTP headers in the response for the service.
Steps to add HTTP headers
To access this option click on the Service Settings ![]() icon and select HTTP Headers as shown in the below figure.
icon and select HTTP Headers as shown in the below figure.


Service Time Delay
Service Virtualization sends a response of the service as soon as the request is received. So, there is no delay in the Response. Users can add service time delay by using Service Time Delay settings.
To access this option click on the Service Settings ![]() icon and select Service Time Delay as shown in the below figure.
icon and select Service Time Delay as shown in the below figure.
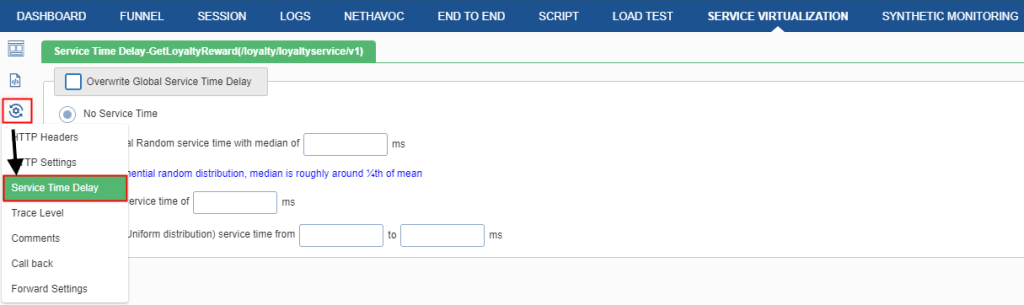
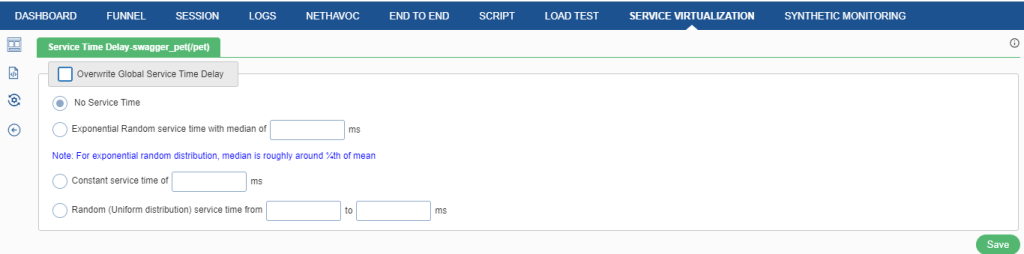
Service time delay settings have the following fields:
- Overwrite Global Service Time Delay: Select this check box to enable service time and proceed further. In overwriting global service time delay, there are the following two options:
- No service time: No service time used.
- Exponential Random service time with median of: For exponential random distribution, the median is roughly around ¼th of the mean. The service time is taken in milliseconds (ms).
- Constant service time: This property is used to provide constant service time. The constant service time is taken in milliseconds (ms).
- Random (Uniform distribution) service time: This property is used for uniform distributions service time. The random service time is taken in milliseconds (ms).
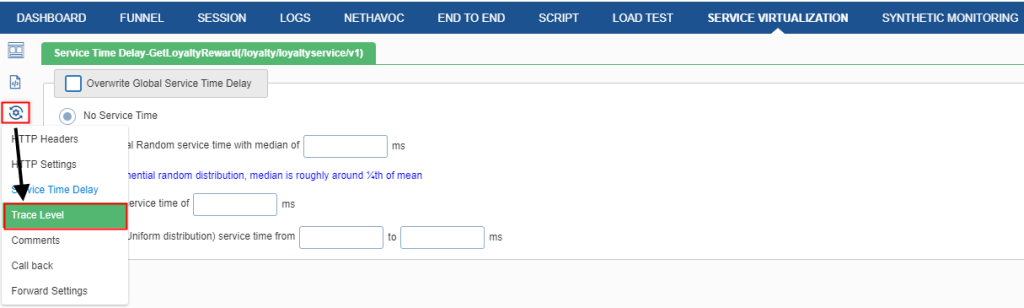
Trace Level
Service Virtualization logs important messages which are called traces. A trace level is used to determine which events the trace provider generates. To access the Trace level, click on the Service Settings ![]() icon and select Trace Level as shown in below figure.
icon and select Trace Level as shown in below figure.
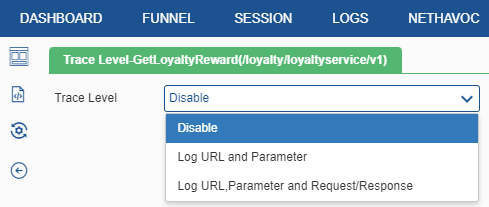
- Disabled: This option is used to disable the trace level. If a user selects this option, then there will be No logs.
- Log URL and Parameter: This option is used to log a request URL with parameter details like parameter name and its value.
- Log URL, Parameter, and Request/Response: This option will log request URL with parameter details like: parameter name and its value, Request/response.
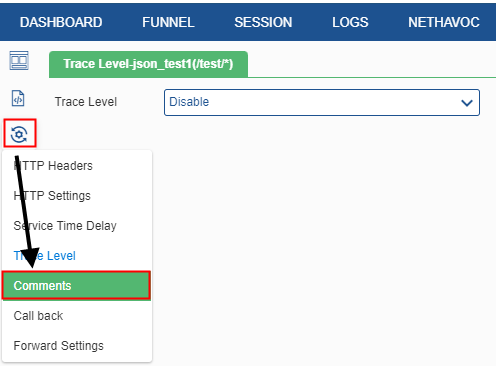
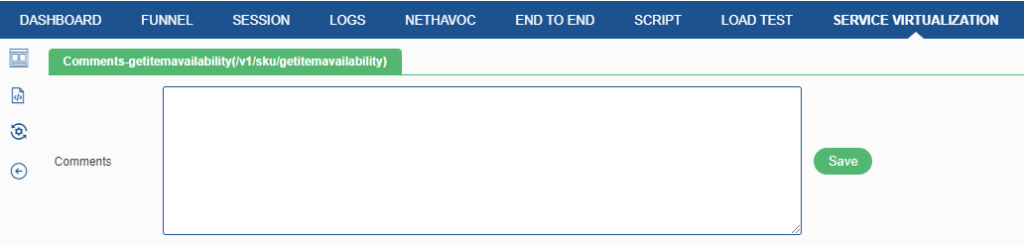
Comments
Using Comments, the user can add comments to the service for his/her reference. For example, design notes, modifications – any user-defined comments.
To access the Trace level, click on the Service Settings ![]() icon and select Comments as shown in below figure.
icon and select Comments as shown in below figure.


Advanced Settings: User can configure the advanced settings for the TCP. The advance settings can be done for request and response both. On clicking the ![]() button, the Advance Settings window is displayed.
button, the Advance Settings window is displayed.


2. Click the beautify icon (![]() ) to format the contents.
) to format the contents.