Overview
This configuration is used to integrate Cavisson NetVision (RUM) with Dynatrace. By enabling this setup, Dynatrace can capture the Session ID and Replay URL from NetVision and associate them with its own distributed traces. This allows teams to:
- Correlate Dynatrace monitoring data with exact end-user sessions recorded in
- Enrich performance and error analysis with end-to-end visibility of real user
Through this integration, you can seamlessly bridge user session replay from NetVision with application performance insights from Dynatrace, ensuring faster root cause analysis and improved user experience monitoring.
Dynatrace Integration Steps
Step 1: Login to Dynatrace portal.
Step 2: Configure Dynatrace to Capture Session and Replay URLs.
To capture the SID (Session ID) and Replay-URL, you need to configure a custom request attribute.
- In the Dynatrace UI, navigate to Apps > Settings classic.
- Under the settings, Click on Server side Monitoring > click on Request Attributes.
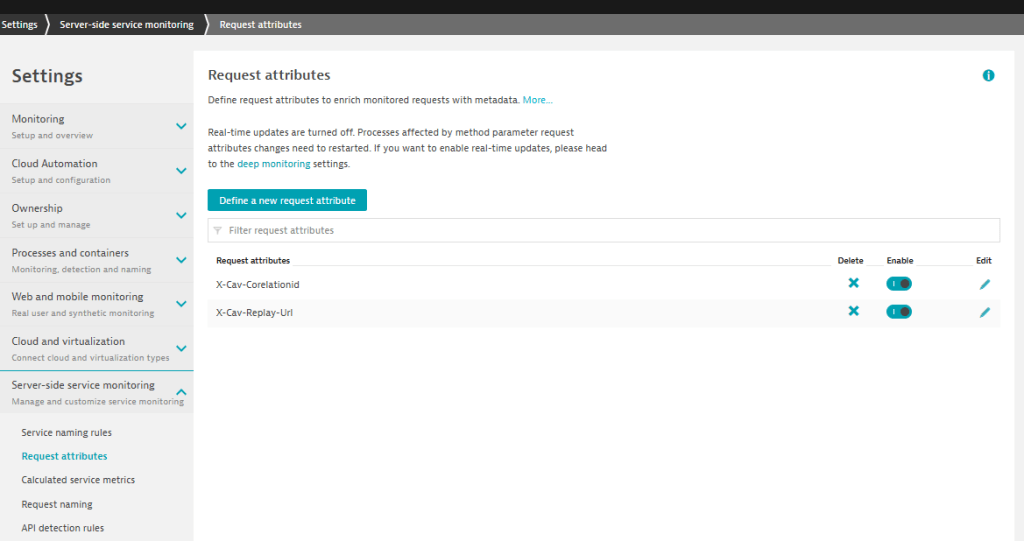
3. Click on “Define a new request attribute”.
4. Specify a new Request Attribute Name as “ X-Cav-Corelationid ”.
5. Set data type as Text. All other settings will remain as
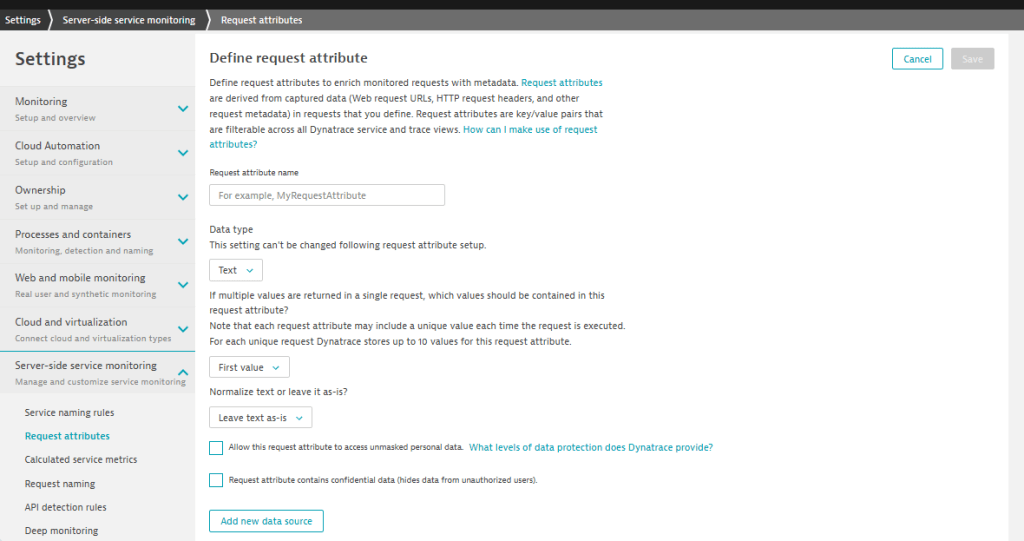
6. Click on Add new data source to specify the Request Attribute
7. In the data source configuration, provide the following details:
- Data sources settings will remain as
- Specify “Http request header” in Request Attribute
- select option “Capture from both client and server side and store where found” in “select where the attribute is stored”
- Specify parameter name as “X-Cav-Corelationid”
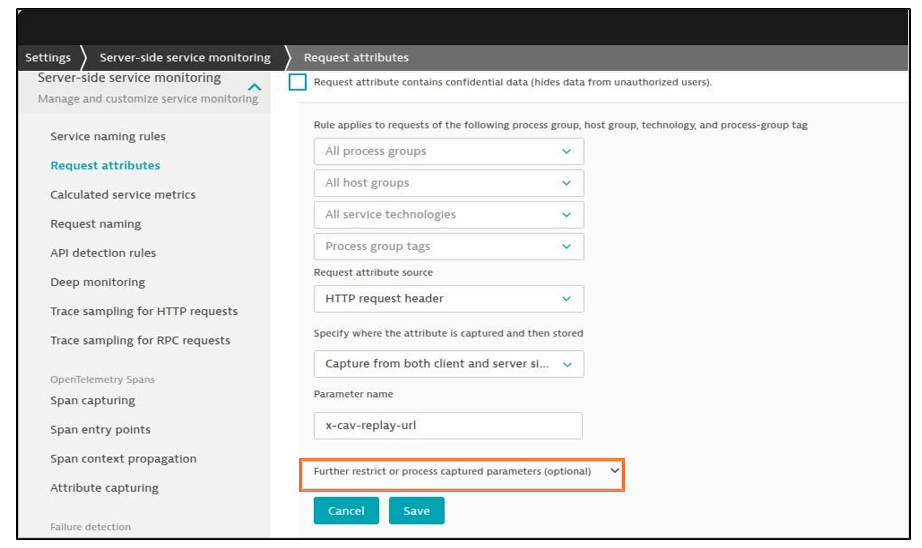
8. Now, click on the optional dropdown for restricting This is required because, in the x-cav-corelationid, three parameters are passed, separated by hyphen (SessionID, PageInstance, and TimeStamp).
9. There will be 5 different steps to restrict the parameter or process only the required value, but we only use the step 1 because it extract on the value before the given delimiter characters (i.e. “-”(hyphen)). Then Click on the Preview processed output to view the resulting string(SessionID)
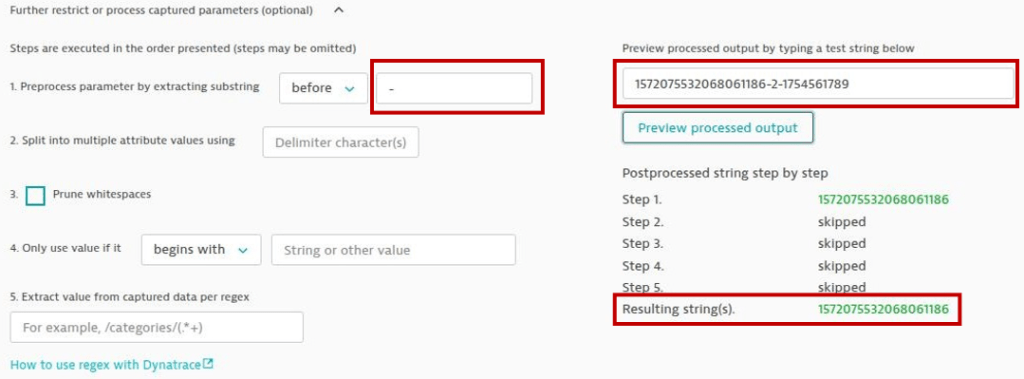
9. You can also test your string as shown in the above
10. After that click on “Save” to save the configuration.

STEP-3: Repeat the above process as given in Step 2(1-7) to create another request attribute for the Session ID “X-Cav-Replay-URL”.
Netvision Configuration Steps
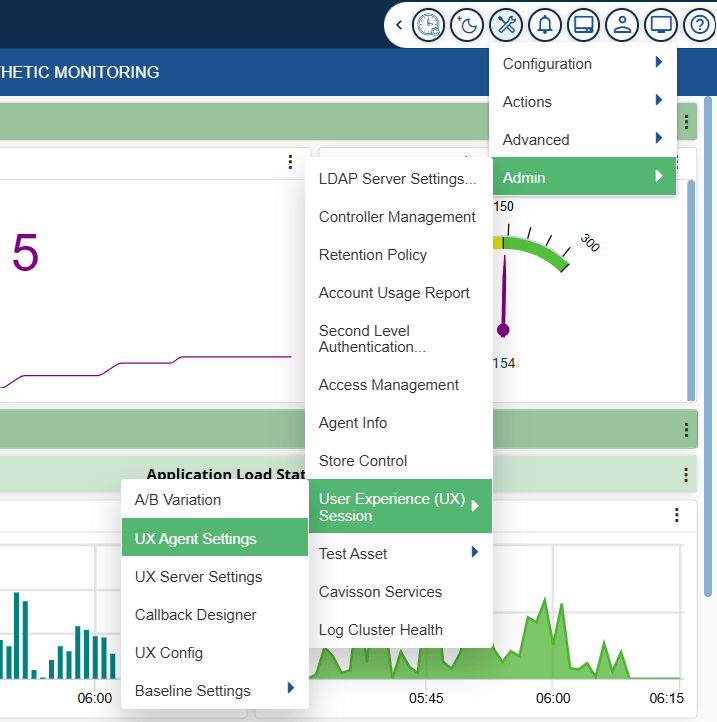
Step 1: Click on Configuration > Admin > User Experience (UX) Session > UX Agent Setting as shown in the below image.
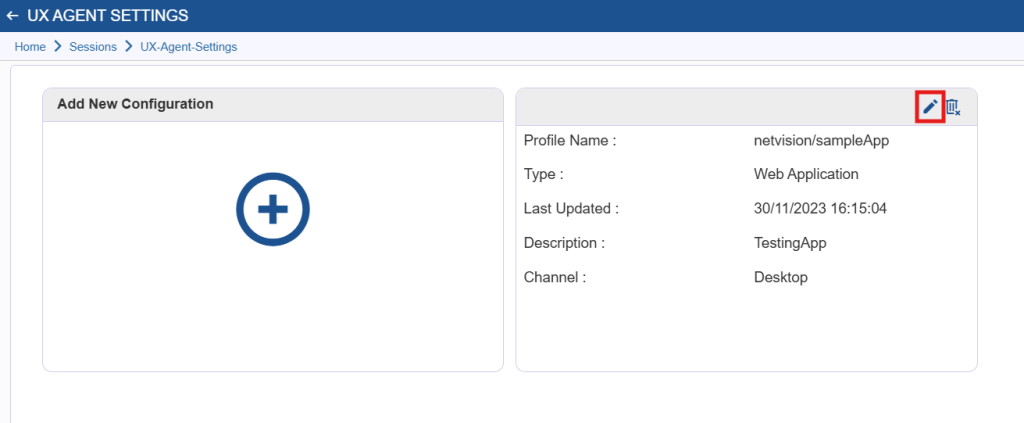
Step 2: You can now be able to see the Configured Agent, click on the edit icon so that you can get into the agent setting.
Step 3: Once you get into the agent setting, you need to scroll down and click the Integration button on the left side of the screen.
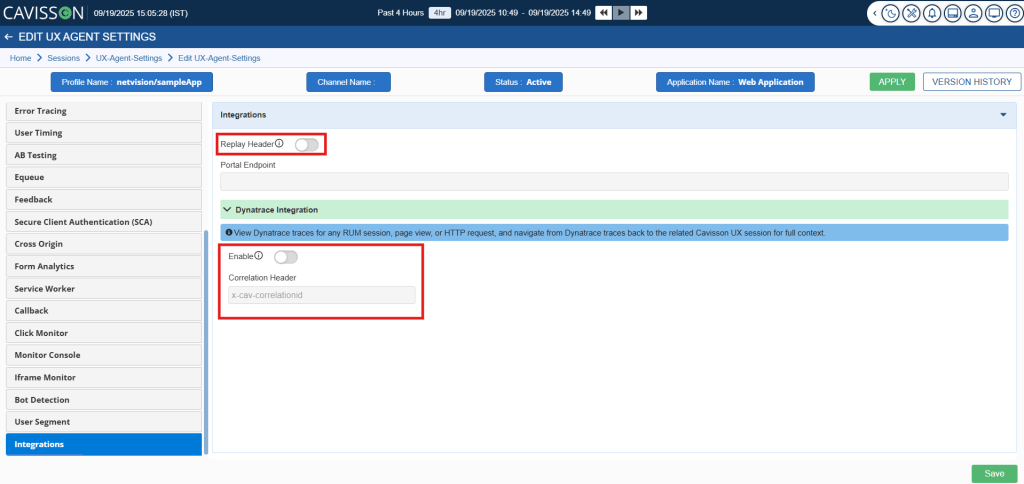
Step 4: Now you need to enable the Replay Header button and then enable the Dynatrace Integration, which generates the request header X-cav-reply-url and X-cav-correlationid with some values.
Summary
By configuring custom request attributes in Dynatrace to capture the Session ID and Replay URL generated from Cavisson NetVision, you enable seamless integration between the two platforms. This setup ensures that every Dynatrace trace can be correlated with the corresponding NetVision session replay. As a result, you gain:
- End-to-end visibility of user journeys.
- Faster troubleshooting through direct replay links.
- Richer context for performance and error analysis.
This integration bridges the gap between user experience monitoring and application performance monitoring, delivering a unified view for effective root cause analysis.